Quantcast
Channel: Mac administration – Der Flounder
Viewing all 490 articles
Browse latest View live

Backing up Self Service bookmarks for Jamf Pro 10.30.0 and later

$
0
0

A while ago, I wrote a post on how to back up your Jamf Pro Self Service bookmarks. I’ve been using that process to back up my bookmarks and it’s been working fine until after my upgrade to Jamf Pro 10.30.0. At that point, my script stopped working. When I checked into it and talked with some colleagues, it became apparent that Jamf had made a change with how they stored bookmark information for Self Service.

In 10.29.x and earlier, Jamf had stored bookmarks as individual plist files in the following location:

/Library/Application Support/JAMF/Self Service/Managed Plug-ins

Screen Shot 2020 09 27 at 11 31 16 AM

In 10.30.x and later, the /Library/Application Support/JAMF/Self Service/Managed Plug-ins directory has disappeared.

Screen Shot 2021 06 23 at 10 37 24 AM

Jamf now stores bookmark information inside an XML file named CocoaAppCD.storedata in the user’s home folder at the following location:

~/Library/Application Support/com.jamfsoftware.selfservice.mac/CocoaAppCD.storedata

Screen Shot 2021 06 23 at 10 35 51 AM

Inside the CocoaAppCD.storedata file, the bookmarks are stored as XML objects similar to what is shown below:

<object type="SSBOOKMARK" id="z169">
<attribute name="url" type="string">https://www.bananas.com</attribute>
<attribute name="priority" type="int64">5</attribute>
<attribute name="displayinbrowser" type="bool">1</attribute>
<attribute name="name" type="string">Bananas.com</attribute>
<attribute name="jssdescription" type="string">Bananas.com</attribute>
<attribute name="installstatus" type="int64">0</attribute>
<attribute name="id" type="int64">2</attribute>
<attribute name="iconurl" type="string">https://ics.services.jamfcloud.com/icon/hash_95740013589cddd19b2192016788dd9e91e735f8ff5213f92005f4eb92ac16b6</attribute>
<attribute name="compliance" type="bool">0</attribute>
<attribute name="buttontext" type="string">Open</attribute>
</object>
view raw
Bananas.com.xml
hosted with ❤ by GitHub

Screen Shot 2021 06 23 at 4 22 03 PM

Fortunately, I was able to figure out a way to do the following:

  1. Parse the document for the bookmark XML objects.
  2. Split them out into individual XML files.
  3. Name the files using the title of the Self Service bookmark.

For more details, please see below the jump.

To make backups of the Self Service bookmarks, I’ve written a script which performs the following tasks:

  1. If necessary, create a directory for storing backup copies of the Self Service bookmark files.
  2. Make copies of the Self Service bookmark files.
  3. Name the copied files using the title of the Self Service bookmark.
  4. Store the copied bookmarks in the specified directory.

Once the script is run, you should see copies of the Self Service bookmark files appearing in the script-specified location. This location can be manually set or created automatically by the script.

Screen Shot 2021 06 23 at 11 11 08 AM

Screen Shot 2021 06 23 at 11 33 09 AM

When examined, the files should look similar to this:

<?xml version="1.0" encoding="UTF-8"?>
<object type="SSBOOKMARK" id="z169">
<attribute name="url" type="string">https://www.bananas.com</attribute>
<attribute name="priority" type="int64">5</attribute>
<attribute name="displayinbrowser" type="bool">1</attribute>
<attribute name="name" type="string">Bananas.com</attribute>
<attribute name="jssdescription" type="string">Bananas.com</attribute>
<attribute name="installstatus" type="int64">0</attribute>
<attribute name="id" type="int64">2</attribute>
<attribute name="iconurl" type="string">https://ics.services.jamfcloud.com/icon/hash_95740013589cddd19b2192016788dd9e91e735f8ff5213f92005f4eb92ac16b6</attribute>
<attribute name="compliance" type="bool">0</attribute>
<attribute name="buttontext" type="string">Open</attribute>
</object>
view raw
Bananas.com.xml
hosted with ❤ by GitHub

The script is available below, and at the following address on GitHub:

https://github.com/rtrouton/rtrouton_scripts/tree/master/rtrouton_scripts/Casper_Scripts/Jamf_Pro_Self_Service_Bookmark_Backup

Jamf_Pro_Self_Service_Bookmark_Backup.sh:

#!/bin/bash
# This script is designed to do the following:
#
# 1. If necessary, create a directory for storing backup copies of Jamf Pro Self Service bookmark files.
# 2. Make copies of the Self Service bookmark files.
# 3. Name the copied files using the title of the Self Service bookmark.
# 4. Store the copied bookmarks in the specified directory.
#
# If you choose to specify a directory to save the Self Service bookmarks into,
# please enter the complete directory path into the SelfServiceBookmarkBackupDirectory
# variable below.
SelfServiceBookmarkBackupDirectory=""
# If the SelfServiceBookmarkBackupDirectory isn't specified above, a directory will be
# created and the complete directory path displayed by the script.
error=0
if [[ -z "$SelfServiceBookmarkBackupDirectory" ]]; then
SelfServiceBookmarkBackupDirectory=$(mktemp -d)
echo "A location to store downloaded groups has not been specified."
echo "Downloaded groups will be stored in $SelfServiceBookmarkBackupDirectory."
fi
self_service_bookmark_file="$HOME/Library/Application Support/com.jamfsoftware.selfservice.mac/CocoaAppCD.storedata"
if [[ -f "$self_service_bookmark_file" ]]; then
tmp_dir="/private/tmp/bookmark-workdir-$(date +%y%m%d%H%M%S)"
mkdir -p "$tmp_dir"
# For the next command, add a trailing slash for
# the the tmp_dir variable if it's not there.
length=${#tmp_dir}
last_char=${tmp_dir:length-1:1}
[[ $last_char != "/" ]] && tmp_dir="$tmp_dir/";
sed -n '/SSBOOKMARK/,/object/p' "$self_service_bookmark_file" | awk -v a=$tmp_dir '/SSBOOKMARK/{filename=a""++i".xml"}; {print >filename}'
#remove trailing slash if needed from the bookmark and tmp directories
SelfServiceBookmarkBackupDirectory=${SelfServiceBookmarkBackupDirectory%%/}
tmp_dir=${tmp_dir%%/}
for file in "$tmp_dir"/*
do
# Add XML declaration to first line if not already present in the file.
# This will allow xmllint to format the XML in human-readable format.
if [[ -z $(cat $file | grep "<?xml version="1.0" encoding="UTF-8"?>") ]]; then
echo -e "<?xml version="\""1.0"\"" encoding="\""UTF-8"\""?>\n$(cat $file)" > $file
fi
bookmark_name=$(cat $file | awk -F '[<>]' '/"name"/{print $3}')
xmllint –format "$file" > "$file"_formatted.xml
mv "$file"_formatted.xml "$SelfServiceBookmarkBackupDirectory/$bookmark_name".xml
if [[ $? -eq 0 ]]; then
echo "$bookmark_name.xml processed and stored in $SelfServiceBookmarkBackupDirectory."
else
echo "ERROR! Problem occurred when processing $self_service_bookmark_file file!"
error=1
fi
done
rm -rf "$tmp_dir"
fi
exit $error

Monitoring Startup Security settings on Apple Silicon Macs

$
0
0

To help maintain the security of the Apple Silicon Macs in your environment, it’s helpful to be able to monitor what the Startup Security settings are for those Macs.

Screen Shot 2021 07 23 at 10 08 32 AM

For this task, the reporting functions of the bputil tool are available. Normally, Apple wants you to avoid the bputil tool like you would a swarm of bees. As part of that, the following warning is displayed by bputil:

username@computername ~ % bputil -d
This utility is not meant for normal users or even sysadmins.
It provides unabstracted access to capabilities which are normally handled for the user automatically when changing the security policy through GUIs such as the Startup Security Utility in macOS Recovery.
It is possible to make your system security much weaker and therefore easier to compromise using this tool.
This tool is not to be used in production environments.
It is possible to render your system unbootable with this tool.
It should only be used to understand how the security of Apple Silicon Macs works.
Use at your own risk!
The tool requires running as root
username@computername ~ %
view raw
gistfile1.txt
hosted with ❤ by GitHub

However, the bputil -d command is safe to use as it displays the contents of the current security policy’s settings. When the default Full Security security mode is enabled, running the bputil -d command with root privileges should display content similar to what’s shown below:

username@computername ~ % sudo bputil -d
Password:
This utility is not meant for normal users or even sysadmins.
It provides unabstracted access to capabilities which are normally handled for the user automatically when changing the security policy through GUIs such as the Startup Security Utility in macOS Recovery.
It is possible to make your system security much weaker and therefore easier to compromise using this tool.
This tool is not to be used in production environments.
It is possible to render your system unbootable with this tool.
It should only be used to understand how the security of Apple Silicon Macs works.
Use at your own risk!
Current OS environment:
OS Type : macOS
Local Policy Nonce Hash (lpnh): 7E1ED4512B6DF2A284C6343E469C1F1459453E4898E770CF37A8F3B1D9C000E0DA0C5C5F0546AB70984BEC3A9870DD9E
Remote Policy Nonce Hash (rpnh): 88EB8429C516B53BBCA49EC7C0D58C3F27F2890D23E176264B2178EE2A865327CFD06ED94834EE6FF7D145FB39245B59
Recovery OS Policy Nonce Hash (ronh): 6CF5EB6318AF551C5A23B8D3B2E4196AAA372B523E4F412C375CF6B39DCFED28F9B4E9881BF348886F9B9A14E918AA69
Current local policy:
Signature Type : BAA
Unique Chip ID (ECID): 0xD793810C0291E
Board ID (BORD): 0x26
Chip ID (CHIP): 0x8103
Certificate Epoch (CEPO): 0x1
Security Domain (SDOM): 0x1
Production Status (CPRO): 1
Security Mode (CSEC): 1
OS Version (love): 21.1.268.5.8,0
Volume Group UUID (vuid): 2D85CA09-A291-47CA-A68A-66CB2D3BDF70
KEK Group UUID (kuid): AC09E9D5-36DC-10C9-4312-E6DAA3753224
Local Policy Nonce Hash (lpnh): 7E1ED4512B6DF2A284C6343E469C1F1459453E4898E770CF37A8F3B1D9C000E0DA0C5C5F0546AB70984BEC3A9870DD9E
Remote Policy Nonce Hash (rpnh): 88EB8429C516B53BBCA49EC7C0D58C3F27F2890D23E176264B2178EE2A865327CFD06ED94834EE6FF7D145FB39245B59
Next Stage Image4 Hash (nsih): 443560FD2BE056BC9527452729EEC1A1BB22BA2DA456B278624DEF822DE9F7A64F0303B64ED811405B4039475F8A623D
User Authorized Kext List Hash (auxp): absent
Auxiliary Kernel Cache Image4 Hash (auxi): absent
Kext Receipt Hash (auxr): absent
CustomKC or fuOS Image4 Hash (coih): absent
Security Mode: Full (smb0): absent
User-allowed MDM Control: Disabled (smb3): absent
DEP-allowed MDM Control: Disabled (smb4): absent
SIP Status: Enabled (sip0): absent
Signed System Volume Status: Enabled (sip1): absent
Kernel CTRR Status: Enabled (sip2): absent
Boot Args Filtering Status: Enabled (sip3): absent
3rd Party Kexts Status: Disabled (smb2): absent
username@computername ~ %
view raw
gistfile1.txt
hosted with ❤ by GitHub

Here’s what bputil -d will return if the Startup Security settings are configured as follows:

  • Reduced Security: Enabled
  • Allow user management or kernel extensions from identified developers: Enabled
  • Allow remote management of kernel extensions from identified developers: Enabled

Screen Shot 2021 07 23 at 10 13 39 AM

username@computername ~ % sudo bputil -d
Password:
This utility is not meant for normal users or even sysadmins.
It provides unabstracted access to capabilities which are normally handled for the user automatically when changing the security policy through GUIs such as the Startup Security Utility in macOS Recovery.
It is possible to make your system security much weaker and therefore easier to compromise using this tool.
This tool is not to be used in production environments.
It is possible to render your system unbootable with this tool.
It should only be used to understand how the security of Apple Silicon Macs works.
Use at your own risk!
Current OS environment:
OS Type : macOS
Local Policy Nonce Hash (lpnh): 987619CF88732BB0FB0CCC476302DFE84EB1C1F7B92E8CBEC4B124D9F76B3DBACD8787E5DEBB8A3F70576639CE74F727
Remote Policy Nonce Hash (rpnh): 88EB8429C516B53BBCA49EC7C0D58C3F27F2890D23E176264B2178EE2A865327CFD06ED94834EE6FF7D145FB39245B59
Recovery OS Policy Nonce Hash (ronh): 6CF5EB6318AF551C5A23B8D3B2E4196AAA372B523E4F412C375CF6B39DCFED28F9B4E9881BF348886F9B9A14E918AA69
Current local policy:
Signature Type : BAA
Unique Chip ID (ECID): 0xD793810C0291E
Board ID (BORD): 0x26
Chip ID (CHIP): 0x8103
Certificate Epoch (CEPO): 0x1
Security Domain (SDOM): 0x1
Production Status (CPRO): 1
Security Mode (CSEC): 1
OS Version (love): 21.1.284.5.5,0
Volume Group UUID (vuid): 2D85CA09-A291-47CA-A68A-66CB2D3BDF70
KEK Group UUID (kuid): AC09E9D5-36DC-10C9-4312-E6DAA3753224
Local Policy Nonce Hash (lpnh): 987619CF88732BB0FB0CCC476302DFE84EB1C1F7B92E8CBEC4B124D9F76B3DBACD8787E5DEBB8A3F70576639CE74F727
Remote Policy Nonce Hash (rpnh): 88EB8429C516B53BBCA49EC7C0D58C3F27F2890D23E176264B2178EE2A865327CFD06ED94834EE6FF7D145FB39245B59
Next Stage Image4 Hash (nsih): 1FAC4F6723D591DD6FAEC1DDB7D84C0AB28782096F8F2570EDA1F3CC41DECBE883A59BC4C3C962484E283F4E11549CB6
User Authorized Kext List Hash (auxp): absent
Auxiliary Kernel Cache Image4 Hash (auxi): absent
Kext Receipt Hash (auxr): absent
CustomKC or fuOS Image4 Hash (coih): absent
Security Mode: Reduced (smb0): 1
User-allowed MDM Control: Enabled (smb3): 1
DEP-allowed MDM Control: Disabled (smb4): absent
SIP Status: Enabled (sip0): absent
Signed System Volume Status: Enabled (sip1): absent
Kernel CTRR Status: Enabled (sip2): absent
Boot Args Filtering Status: Enabled (sip3): absent
3rd Party Kexts Status: Enabled (smb2): 1
username@computername ~ %
view raw
gistfile1.txt
hosted with ❤ by GitHub

Note: This reporting function does not require macOS Recovery and works while booted from regular macOS.

To check the Startup Security settings, the following status codes should be checked:

  • smb0
  • smb2
  • smb3

Screen Shot 2021-07-23 at 10.58.13 AM

In the Startup Security Utility app in macOS Recovery, the following settings correspond to the status codes listed above:

  • smb0: Full Security / Reduced Security
  • smb2: Allow user management of kernel extensions from identified developers
  • smb3: Allow remote management of kernel extensions from identified developers

For more details, please see below the jump.

If you want to check to see if an Apple Silicon Mac is set for Full Security or Reduced Security, run the command shown below with root privileges:

bputil -d | awk '/smb0/ {print $5}'
view raw
gistfile1.txt
hosted with ❤ by GitHub

If Full Security is set, you should see the following result:

absent

Screen Shot 2021 07 23 at 11 11 39 AM

If Reduced Security is set, you should see the following result:

1

Screen Shot 2021 07 23 at 10 33 43 AM

If you want to check to see if an Apple Silicon Mac is set for Allow user management or kernel extensions from identified developers, run the command shown below with root privileges:

bputil -d | awk '/smb2/ {print $7}'
view raw
gistfile1.txt
hosted with ❤ by GitHub

If Allow user management or kernel extensions from identified developers is not set, you should see the following result:

absent

Screen Shot 2021 07 23 at 11 11 10 AM

If Allow user management or kernel extensions from identified developers is set, you should see the following result:

1

Screen Shot 2021 07 23 at 10 36 30 AM

Note: If this setting is returning a value of 1, this means that Reduced Security is enabled, so the smb0 status code will also return 1.

Screen Shot 2021 07 23 at 10 33 43 AM

If you want to check to see if an Apple Silicon Mac is set for Allow remote management of kernel extensions from identified developers, run the command shown below with root privileges:

bputil -d | awk '/smb3/ {print $6}'
view raw
gistfile1.txt
hosted with ❤ by GitHub

If Allow remote management of kernel extensions from identified developers is not set, you should see the following result:

absent

Screen Shot 2021 07 23 at 11 10 36 AM

If Allow remote management of kernel extensions from identified developers is set, you should see the following result:

1

Screen Shot 2021 07 23 at 10 43 26 AM

Note: If this setting is returning a value of 1, this means that Reduced Security is enabled, so the smb0 status code will also return 1.

Screen Shot 2021 07 23 at 10 33 43 AM

Packaging a SAP GUI installer application for macOS

$
0
0

One of the recent changes for the macOS version of SAP GUI for Java is that both SapMachine Java 11 and OpenJFX 11 are now bundled with SAP GUI, so it is no longer required to have Java installed on your machine in order for SAP GUI to work. This change has also been extended to the SAP GUI installer, which is now available as a notarized installer application as of SAP GUI 7.70.

You can run this installer on a Mac which does not have Java already installed and it will install SAP GUI for Java with SapMachine Java 11 and OpenJFX 11 installations embedded inside the SAP GUI application.

Note: As of SAP GUI 7.70 rev 2, Rosetta 2 is required if installing on an Apple Silicon Mac so Rosetta needs to be installed and running before installing SAP GUI.

The installer application is available for download to customers via a link on the announcement blog post:

https://blogs.sap.com/2021/03/16/ann-sap-gui-for-java-7.70-available-for-download/

When you click the download link, you will see two choices:

  • DMG
  • JAR

Screen Shot 2021 07 26 at 9 52 31 AM

The DMG download will provide the notarized installer application and the JAR download will provide the Java .jar installer that SAP GUI has traditionally used on macOS. I’ve discussed how to package the .jar installer in previous posts, so this post is going to focus on the new installer application contained inside the DMG download.

Screen Shot 2021 07 26 at 9 52 32 AM

For more details, please see below the jump.

If you want to run the SAP GUI installer application without repackaging it as a macOS installer package, use the procedure below:

1. Download the disk image.

Screen Shot 2021 07 26 at 2 00 35 PM

2. Mount the disk image.

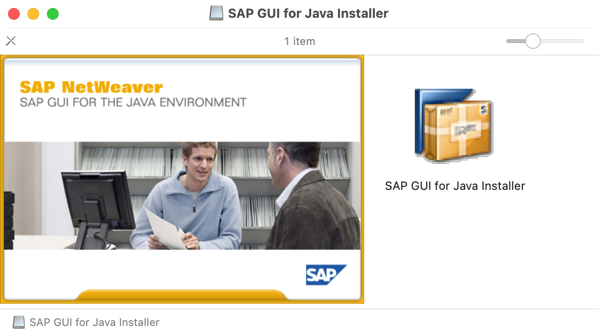
Screen Shot 2021 07 22 at 2 16 27 PM

3. Copy the SAP GUI for Java Installer application to a convenient location.

Screen Shot 2021 07 26 at 2 28 16 PM

If you have a templates.jar file, copy the templates.jar file to the same location. As long as both files are in the same directory, the SAP GUI for Java Installer application will detect and use the templates.jar file’s contents to help configure SAP GUI.

Screen Shot 2021 07 26 at 2 02 26 PM

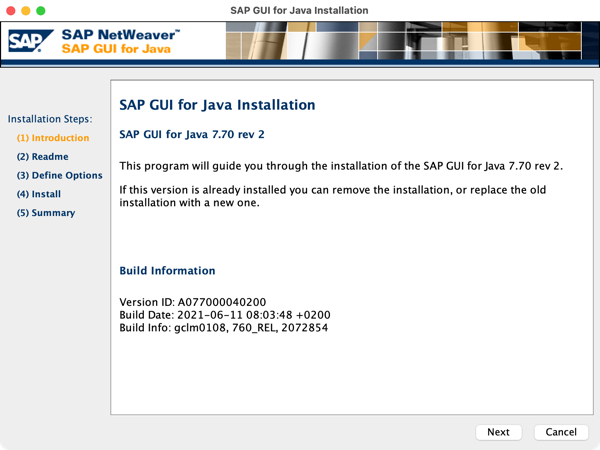
4. Launch the SAP GUI for Java Installer application.

Screen Shot 2021 07 22 at 2 16 55 PM

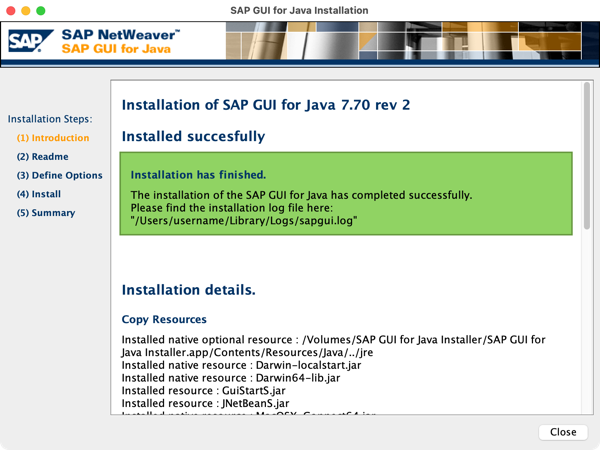
5. Follow the prompts to install.

Screen Shot 2021 07 22 at 2 17 20 PM

Screen Shot 2021 07 22 at 2 17 32 PM

Screen Shot 2021 07 22 at 2 17 56 PM

To build an installer package for SAP GUI which uses the installer application, use the procedure shown below:

Building the SAP GUI installer

Pre-requisites:

  • Packages
  • SAP GUI for Java Installer application
  • templates.jar file (optional)

1. Set up a new Packages project and select Raw Package.

Screen Shot 2021 07 26 at 10 34 15 AM

2. In this case, I’m naming the project SAP GUI 7.70 rev2.

Screen Shot 2021 07 26 at 10 34 25 AM

3. Once the Packages project opens, click on the Project tab. You’ll want to make sure that the your information is correctly set here (if you don’t know what to put in, check the Help menu for the Packages User Guide. The information you need is in Chapter 4 – Configuring a project.)

Screen Shot 2021 07 26 at 10 35 18 AM

In this example, I’m not changing any of the options from what is set by default.

4. Next, click on the Settings tab. In the case of my project, I want to install with root privileges and not require a logout, restart or shutdown.

To accomplish this, I’m choosing the following options in the Settings section:

In the Tag section:

  • Identifier: set as appropriate (for my installer, I’m using com.sap.pkg.SAPGUI770rev2
  • Version: set as appropriate (for my installer, I’m usings 7.70.02 )

In the Post-installation Behavior section:

  • On Success: should be set to Do Nothing

In the Options section:

  • Require admin password for installation should be checked
  • Relocatable should be unchecked
  • Overwrite directory permissions should be unchecked
  • Follow symbolic links should be unchecked

Screen Shot 2021 07 26 at 10 35 58 AM

7. Select the Payload tab. Nothing here should be changed from the defaults.

Screen Shot 2021 07 26 at 10 36 06 AM

8. Select the Scripts tab.

Under the Additional Resources section, add the following files:

  • The latest SAP GUI for Java installer (this is the SAP GUI for Java Installer application file)

Screen Shot 2021 07 26 at 10 51 17 AM

Screen Shot 2021 07 26 at 10 51 26 AM

  • If you have a templates.jar file, also add that file.

Screen Shot 2021 07 26 at 10 51 46 AM

Screen Shot 2021 07 26 at 2 15 31 PM

The last part is telling the SAP GUI for Java installer to run. For this, you’ll need a postinstall script.

Here’s the postinstall script being used for this installer package:

#!/bin/bash
install_dir=$(/usr/bin/dirname $0)
sap_gui_installer="$install_dir/SAP GUI for Java Installer.app"
sap_gui_install_path="/Applications/SAP Clients"
ERROR=0
if [[ -x "$sap_gui_installer" ]]; then
echo "Attempting to install $sap_gui_install"
"$sap_gui_installer/Contents/MacOS/install" -G –installdir "${sap_gui_install_path}" -J "${install_dir}" –force
if [[ $? -ne 0 ]]; then
echo "ERROR! Installation of $sap_gui_installer failed"
ERROR=1
else
echo "Successfully installed $sap_gui_installer"
fi
else
echo "$sap_gui_installer not found or not executable."
ERROR=1
fi
exit $ERROR
view raw
gistfile1.txt
hosted with ❤ by GitHub

If not already selected, select the postinstall script and add it to the project.

Screen Shot 2021 07 26 at 10 52 18 AM

Screen Shot 2021 07 26 at 10 52 31 AM

9. Build the package. (If you don’t know to build, check the Help menu for the Packages User Guide. The information you need is in Chapter 3 – Creating a raw package project and Chapter 10 – Building a project.)

Screen Shot 2021 07 26 at 10 38 13 AM

Screen Shot 2021 07 26 at 10 38 20 AM

Testing the installer

Once the package has been built, test it by installing it on a test machine which has the following:

  • Does not have the SAP GUI client installed

The end result should be that the SAP GUI client installs into /Applications.

Screen Shot 2021 07 26 at 1 48 42 PM

If a templates.jar file was included with the installer, the SAP GUI configuration files specified by the templates.jar file should also be installed.

Screen Shot 2021 07 26 at 1 47 38 PM

Signing AutoPkg-built packages using a .sign recipe

$
0
0

For those that need to sign their AutoPkg-generated installer packages with a signing certificate, the PkgSigner processor is available to assist with this. When I originally started using this processor, I was building the signing part directly into .pkg recipes, but my teammate @jaharmi came up with a better and more modular idea: the .sign recipe.

Screen Shot 2021 07 30 at 2 09 06 PM

The .sign recipe uses the PkgSigner processor and is designed to be placed in the AutoPkg workflow between a .pkg recipe and a.jss recipe for JSSImporter, a .munki recipe for Munki or other recipes used to upload an installer package to a deployment tool. In this case, the .pkg recipe would be a parent recipe for the .sign recipe. In turn, the .sign recipe would be used as the parent recipe for whatever came next in the workflow.

Screen Shot 2021 07 30 at 2 07 10 PM

For those who want to use .sign recipes, there is an example recipe available via the link below:

https://github.com/autopkg/rtrouton-recipes/blob/master/SharedProcessors/Example.sign.recipe

If you want to use the PkgSigner processor hosted from my AutoPkg recipe repo, first verify that AutoPkg is installed on the Mac you’re using. Once verified, run the following command:

autopkg repo-add rtrouton-recipes

Downloading and installing macOS Big Sur via macOS Recovery’s Terminal

$
0
0

Every so often, you may find yourself in a situation where you need to reinstall macOS Big Sur and everything is failing on you. Installing from macOS Recovery? Not working via the usual methods. Building a USB installer? Left the flash drive in your other pants. Using DFU mode and Apple Configurator on an Apple Silicon Mac? You need a second Mac to use this process and you just have the one Mac available.

For those situations, there’s one more option when you’ve exhausted all of the others. For more details, please see below the jump.

This method is referenced in the following Apple KBase article:

https://support.apple.com/HT211983

It involves the following:

  • Wiping the drive that you intend to install macOS Big Sur onto.
  • Creating the proper directory structure manually on the drive.
  • Copying the Install macOS app available in macOS Recovery manually into the proper location on the drive 
  • Using the curl tool to download the needed installer files onto the drive
  • Launching the Install macOS app
  • Using the Install macOS app to install macOS Big Sur

To install macOS Big Sur using the methods described above, use the procedure below:

1. Boot to macOS Recovery.

Screen Shot 2021 08 04 at 12 03 17 PM

2. Erase your Mac’s startup drive using the correct procedure for your Mac model:

Macs with Intel processors: https://support.apple.com/HT208496
Apple Silicon Macs: https://support.apple.com/kb/HT212030

By default, an erased drive is named Untitled. We’ll be using that drive name for the examples shown in this post.

2. Once the drive is erased, open Safari and go to the following URL:

https://support.apple.com/HT211983

Screen Shot 2021 08 04 at 12 03 18 PM

Screen Shot 2021 08 04 at 12 04 29 PM


3. Scroll to the bottom of the KBase article and locate the Or use Terminal to reinstall section.

Screen Shot 2021 08 04 at 12 05 46 PM


4. Copy the complete command which begins with curl. (This will save a lot of typing later.)

Screen Shot 2021 08 04 at 12 05 47 PM


5. Quit Safari.

6. Open Terminal.

Screen Shot 2021 08 04 at 12 13 45 PM

Screen Shot 2021 08 04 at 12 14 04 PM


7. Run the following command to change to using the drive named Untitled:

cd "/Volumes/Untitled"

Screen Shot 2021 08 04 at 10 29 27 AM


8. Run the following command to create a directory named private on the Untitled drive as well as a sub-directory inside of private which is named tmp:

mkdir -p private/tmp

Screen Shot 2021 08 04 at 10 30 11 AM


9. Run the following command to copy the Install macOS Big Sur.app application from macOS Recovery to the /Volumes/Untitled/private/tmp directory.

cp -R "/Install macOS Big Sur.app" private/tmp

Screen Shot 2021 08 04 at 10 31 03 AM


10. Run the following command to change to the /Volumes/Untitled/private/tmp/Install macOS Big Sur.app directory:

cd "private/tmp/Install macOS Big Sur.app"

Screen Shot 2021 08 04 at 10 32 00 AM


11. Run the following command to create a directory named Contents on the Untitled drive as well as a sub-directory inside of Contents which is named SharedSupport:

mkdir Contents/SharedSupport

Screen Shot 2021 08 04 at 10 33 44 AM


12. Paste the copied curl command and hit the enter key on your keyboard to have the macOS Big Sur installer files be downloaded into a file named SharedSupport.dmg. The SharedSupport.dmg will be located in /Volumes/Untitled/private/tmp/Install macOS Big Sur.app directory/Contents/SharedSupport.

curl -L -o Contents/SharedSupport/SharedSupport.dmg https://swcdn.apple.com/content/downloads/01/60/071-72781-A_CZ1D1FENMH/a09fvud3xxgih7qyau9a7lhtspho36mp0l/InstallAssistant.pkg

Screen Shot 2021 08 04 at 10 47 06 AM

Screen Shot 2021 08 04 at 10 47 34 AM

13. Once curl has finished downloading /Volumes/Untitled/private/tmp/Install macOS Big Sur.app directory/Contents/SharedSupport/SharedSupport.dmg, run the following command to launch the macOS Big Sur installer.

./Contents/MacOS/InstallAssistant_springboard

Screen Shot 2021 08 04 at 10 51 29 AM

Screen Shot 2021 08 04 at 10 53 05 AM

Screen Shot 2021 08 04 at 10 55 20 AM

14. Follow the prompts to install macOS Big Sur.

Screen Shot 2021 08 04 at 11 04 32 AM

Screen Shot 2021 08 04 at 11 04 38 AM

Screen Shot 2021 08 04 at 11 04 46 AM

Codesigning, untrusted certificate authorities and why certain apps aren’t launching

$
0
0

A number of folks noticed that certain older applications they use on macOS stopped working as of August 24th, 2021. As of this date, this appears to affect the following applications among others:

Note: This list is not complete, it’s just the ones I’m aware of as of August 24, 2021.

Why this is happening goes back to an episode in 2018, where Symantec had to get out of the PKI certificate issuing business because of a number of issues discovered with how Symantec had been issuing certificates.

As part of these issues, Apple issued an advisory that a number of Symantec Certificate Authority (CA) root certificates were to be distrusted by Apple on a timeline which concluded with the full distrust of Symantec CAs on February 25, 2020.

While this primarily affected website operators, Symantec also issued certificates from the affected Symantec CAs which were used to provide code signing for applications. An example of this is RSA SecurID Software Token 4.2.1.


Update 8-26-2021: RSA has released RSA SecurID Software Token 4.2.2 to resolve the issue with RSA SecurID Software Token 4.2.1. For more details, please see the link below:

https://community.rsa.com/t5/securid-access-product/updated-securid-announces-securid-software-token-4-2-2-for-macos/ta-p/640000?emcs_t=S2h8ZW1haWx8Ym9hcmRfc3Vic2NyaXB0aW9ufEtTUTg5SktCWUQxS1JHfDY0MDAwMHxTVUJTQ1JJUFRJT05TfGhL


In the case of SecureID, this app relies on Qt Core for user interface support and ships copies of the QT Core framework along with the SecureID app. SecurID stores this in the following location:

/Library/Frameworks/stauto32.framework

If you take a look at the installer, you can see where the files are supposed to go.

Screen Shot 2021 08 24 at 6 25 25 PM

However, the actual file which is causing the issue is buried further down in the following location:

/Library/Frameworks/stauto32.framework/Versions/4/QtCore.cire

Screen Shot 2021 08 24 at 6 27 36 PM

This file is important because the QT Core framework is shipped without Apple’s code signing, which is to say that QT is not using an Apple Developer ID signing certificate to sign QT Core. Instead, QT ships a code signing certificate chain and that information is stored in the QtCore.cire file.

One of the certificates in the code signing certificate chain is using VeriSign Class 3 Public Primary Certification Authority – G5 as its root certificate authority (root CA). That root CA is one of the Symantec CAs which is no longer trusted by Apple.

Screen Shot 2021 08 24 at 6 03 58 PM

To summarize: the SecureID app has a component which is signed by a not-trusted certificate. This is causing SecureID to not trust that component, which then prevents the app from launching correctly.

Image

Why is this happening now?

Apple released updates on August 23, 2021 for both XProtect (now version 2150) and Malware Removal Tool (now version 1.82). My assumption is that XProtect’s update included instructions to no longer accept code signing from the distrusted Symantec CAs. XProtect checks executable code on launch, so it would be working with Gatekeeper to detect and block the no-longer-trusted code signing.

What should you do?

See if your vendor has released an updated version of the app which is having problems. If they haven’t yet, I recommend contacting them to make sure they’re aware of the problem.

Hat tip to all the folks working on this issue in the MacAdmins Slack for helping diagnose the issue and why it is happening.

Using the Jamf Pro API to report on which Macs are assigned to a particular person

$
0
0

Every so often, it may be necessary to generate a report from Jamf Pro on which computers are assigned to a particular person. To assist with this task, I’ve written a script which uses the Jamf Pro Classic API to search through the computer inventory records and generate a report in .tsv format.

For more details, please see below the jump.

Pre-requisites:

If setting up a specific Jamf Pro user account for this purpose with limited rights, here are the required API privileges for the account on the Jamf Pro server:

Jamf Pro Server Objects

  • Computers: Read

Computer inventory records

  • In Jamf Pro, the username field must be populated in the User and Location section of the computer inventory record.

Screen Shot 2021 08 26 at 3 43 23 PM


For authentication, the script can accept manual input or values stored in a ~/Library/Preferences/com.github.jamfpro-info.plist file.

The plist file can be created by running the following commands and substituting your own values where appropriate:

To store the Jamf Pro URL in the plist file:

defaults write com.github.jamfpro-info jamfpro_url https://jamf.pro.server.goes.here:port_number_goes_here

To store the account username in the plist file:

defaults write com.github.jamfpro-info jamfpro_user account_username_goes_here

To store the account password in the plist file:

defaults write com.github.jamfpro-info jamfpro_password account_password_goes_here

This script imports a list of usernames from a plaintext file and uses that information to generate a report about the computers assigned to that username.

Usage:

./Generate_Assigned_Mac_Report_From_Jamf_Pro_Usernames.sh usernames.txt

Screen Shot 2021 08 26 at 3 34 47 PM

Plaintext file format should look like this:

username
otheruser
view raw
usernames.txt
hosted with ❤ by GitHub

The script can also accept one username as input, if a plaintext file containing usernames
is not available.

Usage:

./Generate_Assigned_Mac_Report_From_Jamf_Pro_Usernames.sh

Screen Shot 2021 08 26 at 3 34 00 PM


Once the username(s) are read from in from the plaintext file or from manual input, the script takes the following actions:

1. Uses the Jamf Pro API to download all information about the matching computer inventory record in XML format.
2. Pulls the following information out of the inventory entry:

  • Jamf Pro ID
  • Assigned user’s username
  • Assigned user’s email
  • Manufacturer
  • Model
  • Serial Number
  • Hardware UDID

3. Create a report in tab-separated value (.tsv) format which contains the following information about the deleted Macs

  • Jamf Pro ID
  • Assigned user’s username
  • Assigned user’s email
  • Manufacturer
  • Model
  • Serial Number
  • Hardware UDID
  • Jamf Pro URL for the computer inventory record

This script will generate a report in .tsv format with information similar to what’s shown below:

One user:


Jamf Pro ID Number Assigned User Assigned User Email Make Model Serial Number UDID Jamf Pro URL
13 username username@pretendco.com Apple Mac mini (Mid 2011) C07GM01TDJD0 00BC7701-6791-573D-B461-470B44D16DF6 https://jamfpro.pretendco.com:8443/computers.html?id=13
86 username username@pretendco.com Apple iMac Pro Intel (Retina 5k, 27-inch, Late 2017) VM0N0WRc4EjC 564D33BC-AF4C-86CF-1DFB-AF6EDFC395A3 https://jamfpro.pretendco.com:8443/computers.html?id=86
87 username username@pretendco.com Apple iMac Pro Intel (Retina 5k, 27-inch, Late 2017) VMWmmR2FJqk3 564D4A6F-280F-1EC0-5E66-178DB2D45A8A https://jamfpro.pretendco.com:8443/computers.html?id=87
view raw
tmp.d5KLaAhc.tsv
hosted with ❤ by GitHub

Multiple users:


Jamf Pro ID Number Assigned User Assigned User Email Make Model Serial Number UDID Jamf Pro URL
13 username username@pretendco.com Apple Mac mini (Mid 2011) C07GM01TDJD0 00BC7701-6791-573D-B461-470B44D16DF6 https://jamfpro.pretendco.com:8443/computers.html?id=13
86 username username@pretendco.com Apple iMac Pro Intel (Retina 5k, 27-inch, Late 2017) VM0N0WRc4EjC 564D33BC-AF4C-86CF-1DFB-AF6EDFC395A3 https://jamfpro.pretendco.com:8443/computers.html?id=86
87 username username@pretendco.com Apple iMac Pro Intel (Retina 5k, 27-inch, Late 2017) VMWmmR2FJqk3 564D4A6F-280F-1EC0-5E66-178DB2D45A8A https://jamfpro.pretendco.com:8443/computers.html?id=87
85 otheruser otheruser@pretendco.com Apple VMware Virtual Platform VMD4TkB2CNtn 564D6125-8B99-47F1-9867-F92CD80BF0C9 https://jamfpro.pretendco.com:8443/computers.html?id=85
view raw
tmp.crenHMuh.tsv
hosted with ❤ by GitHub

This script is available below and also from GitHub at the following location:

https://github.com/rtrouton/rtrouton_scripts/tree/main/rtrouton_scripts/Casper_Scripts/Generate_Assigned_Mac_Report_From_Jamf_Pro_Usernames

#!/bin/bash
# This script imports a list of usernames from a plaintext file
# and uses that information to generate a report about the computers
# assigned to that username.
#
# ./Generate_Assigned_Mac_Report_From_Jamf_Pro_Usernames.sh usernames.txt
#
# The script can also accept one username as input, if a plaintext file containing usernames
# is not available.
#
# Usage: ./Generate_Assigned_Mac_Report_From_Jamf_Pro_Usernames.sh
#
# Plaintext file format should look like this:
#
# first_username_goes_here
# second_username_goes_here
# third_username_goes_here
# fourth_username_goes_here
#
# Once the username(s) are read from in from the plaintext file or from manual input, the script takes the following actions:
#
# 1. Uses the Jamf Pro API to download all information about the matching computer inventory record in XML format.
# 2. Pulls the following information out of the inventory entry:
#
# Jamf Pro ID
# Assigned user's username
# Assigned user's email
# Manufacturer
# Model
# Serial Number
# Hardware UDID
#
# 3. Create a report in tab-separated value (.tsv) format which contains the following information
# about the deleted Macs
#
# Jamf Pro ID
# Assigned user's username
# Assigned user's email
# Manufacturer
# Model
# Serial Number
# Hardware UDID
# Jamf Pro URL for the computer inventory record
report_file="$(mktemp).tsv"
# If you choose to hardcode API information into the script, set one or more of the following values:
#
# The username for an account on the Jamf Pro server with sufficient API privileges
# The password for the account
# The Jamf Pro URL
# Set the Jamf Pro URL here if you want it hardcoded.
jamfpro_url=""
# Set the username here if you want it hardcoded.
jamfpro_user=""
# Set the password here if you want it hardcoded.
jamfpro_password=""
# If you do not want to hardcode API information into the script, you can also store
# these values in a ~/Library/Preferences/com.github.jamfpro-info.plist file.
#
# To create the file and set the values, run the following commands and substitute
# your own values where appropriate:
#
# To store the Jamf Pro URL in the plist file:
# defaults write com.githubjamfpro-info jamfpro_url https://jamf.pro.server.goes.here:port_number_goes_here
#
# To store the account username in the plist file:
# defaults write com.githubjamfpro-info jamfpro_user account_username_goes_here
#
# To store the account password in the plist file:
# defaults write com.githubjamfpro-info jamfpro_password account_password_goes_here
#
# If the com.github.jamfpro-info.plist file is available, the script will read in the
# relevant information from the plist file.
jamf_plist="$HOME/Library/Preferences/com.github.jamfpro-info.plist"
if [[ -r "$jamf_plist" ]]; then
if [[ -z "$jamfpro_url" ]]; then
jamfpro_url=$(defaults read "${jamf_plist%.*}" jamfpro_url)
fi
if [[ -z "$jamfpro_user" ]]; then
jamfpro_user=$(defaults read "${jamf_plist%.*}" jamfpro_user)
fi
if [[ -z "$jamfpro_password" ]]; then
jamfpro_password=$(defaults read "${jamf_plist%.*}" jamfpro_password)
fi
fi
# If the Jamf Pro URL, the account username or the account password aren't available
# otherwise, you will be prompted to enter the requested URL or account credentials.
if [[ -z "$jamfpro_url" ]]; then
read -p "Please enter your Jamf Pro server URL : " jamfpro_url
fi
if [[ -z "$jamfpro_user" ]]; then
read -p "Please enter your Jamf Pro user account : " jamfpro_user
fi
if [[ -z "$jamfpro_password" ]]; then
read -p "Please enter the password for the $jamfpro_user account: " -s jamfpro_password
fi
echo ""
# Set initial status for exit
error=0
filename="$1"
# If a text file with usernames has not been provided, the script
# will prompt for a single username.
if [[ -z "$filename" ]]; then
read -p "Please enter the relevant username : " assigned_user
assigned_user_filename=$(mktemp)
/usr/bin/touch "$assigned_user_filename"
echo "$assigned_user" > "$assigned_user_filename"
fi
if [[ -z "$filename" ]] && [[ -r "$assigned_user_filename" ]]; then
filename="$assigned_user_filename"
fi
# Remove the trailing slash from the Jamf Pro URL if needed.
jamfpro_url=${jamfpro_url%%/}
progress_indicator() {
spinner="⠋⠙⠹⠸⠼⠴⠦⠧⠇⠏"
while :
do
for i in $(seq 0 7)
do
echo -n "${spinner:$i:1}"
echo -en "\010"
/bin/sleep 0.10
done
done
}
echo "Report being generated. File location will appear below once ready."
progress_indicator &
SPIN_PID=$!
trap "kill -9 $SPIN_PID" $(seq 0 15)
# Create temp files for data
idtempfile=$(mktemp)
xmltempfile=$(mktemp)
/usr/bin/touch "$xmltempfile"
# Get all computers that are associated with username
while read -r UserToMatch; do
# Get all computers associated with usernames
/usr/bin/curl -sfu "$jamfpro_user:$jamfpro_password" "${jamfpro_url}/JSSResource/computers/match/${UserToMatch}" -H "Accept: application/xml" | xmllint –format – >> "$xmltempfile"
done < "$filename"
# Extract the Jamf Pro computer IDs
/bin/cat "$xmltempfile" | sed -n 's:.*<id>\(.*\)</id>.*:\1:p' > "$idtempfile"
while read -r ID; do
if [[ "$ID" =~ ^[0-9]+$ ]]; then
ComputerRecord=$(/usr/bin/curl -sfu "$jamfpro_user:$jamfpro_password" "${jamfpro_url}/JSSResource/computers/id/$ID" -H "Accept: application/xml" 2>/dev/null)
if [[ ! -f "$report_file" ]]; then
/usr/bin/touch "$report_file"
printf "Jamf Pro ID Number\tAssigned User\tAssigned User Email\tMake\tModel\tSerial Number\tUDID\tJamf Pro URL\n" > "$report_file"
fi
Make=$(echo "$ComputerRecord" | xmllint –xpath '//computer/hardware/make/text()'2>/dev/null)
AssignedUser=$(echo "$ComputerRecord" | xmllint –xpath '//computer/location/username/text()'2>/dev/null)
AssignedUserEmail=$(echo "$ComputerRecord" | xmllint –xpath '//computer/location/email_address/text()'2>/dev/null)
MachineModel=$(echo "$ComputerRecord" | xmllint –xpath '//computer/hardware/model/text()'2>/dev/null)
SerialNumber=$(echo "$ComputerRecord" | xmllint –xpath '//computer/general/serial_number/text()'2>/dev/null)
JamfProID=$(echo "$ComputerRecord" | xmllint –xpath '//computer/general/id/text()'2>/dev/null)
UDIDIdentifier=$(echo "$ComputerRecord" | xmllint –xpath '//computer/general/udid/text()'2>/dev/null)
JamfProURL=$(echo "$jamfpro_url"/computers.html?id="$JamfProID")
if [[ $? -eq 0 ]]; then
printf "$JamfProID\t$AssignedUser\t$AssignedUserEmail\t$Make\t$MachineModel\t$SerialNumber\t$UDIDIdentifier\t${JamfProURL}\n" >> "$report_file"
else
echo "ERROR! Failed to read computer record with id $JamfProID"
error=1
fi
fi
done < "$idtempfile"
# Clean up temp files
if [[ -f "$assigned_user_filename" ]]; then
rm -rf "$assigned_user_filename"
fi
if [[ -f "$xmltempfile" ]]; then
rm -rf "$xmltempfile"
fi
if [[ -f "$idtempfile" ]]; then
rm -rf "$idtempfile"
fi
kill -9 "$SPIN_PID" 2>/dev/null
if [[ -f "$report_file" ]]; then
echo "Report on Macs available here: $report_file"
fi
exit "$error"

Setting up software deployment groups using a Jamf Pro Extension Attribute

$
0
0

When setting up software for deployment, it’s usually a good idea to first send it out to a small percentage of the Macs in your environment. That way, if there’s a problem that wasn’t caught in testing, the amount of cleanup required is also small. If that initial deployment works, the software can then be sent out to greater percentages of the Mac population until all of them are eventually covered by the deployment.

This can be a pain to track manually though. New Macs come in, older ones are retired and keeping all Macs covered can turn into a significant investment of time. Fortunately, this is a task which can be automated and enable the Macs to assign themselves to deployment groups based on their machine UUID identifier. For more details, please see below the jump.

This method uses a Jamf Pro Extension Attribute, which is designed to calculate and set a numerical identifier for individual Macs based on the Mac’s machine UUID. This numerical identifier in turn is designed to be used to determine deployment groups.

Jamf Pro Extension Attribute Setup

Once identified, the value will be written to a plist file located in /Library/Preferences. By default, this file is named as follows:

/Library/Preferences/com.companyname.deploymentgroup.plist

You can change the companyname part by setting a different value for the organizationName variable in the Extension Attribute.

Screen Shot 2021 09 10 at 3 41 23 PM


If the plist file is present in /Library/Preferences, the Extension Attribute will read the correct value from the plist file.

If the plist file is not present in /Library/Preferences, the Extension Attribute will calculate the correct value and store in the plist as the value of the deploymentGroupAssignmentValue key.

Screen Shot 2021 09 10 at 8 36 20 PM

By default, this Extension Attribute is designed to assign Macs to seven deployment groups, with the following percentage of Macs assigned to each group.


Deployment Group Percentage of Macs
1 1
2 5
3 10
4 20
5 20
6 20
7 24
view raw
Deployment_Group.csv
hosted with ❤ by GitHub

When all is working correctly, the Extension Attribute will display one of the following values for each Mac:

1
2
3
4
5
6
7
view raw
gistfile1.txt
hosted with ❤ by GitHub

Screen Shot 2021 09 10 at 4 29 58 PM


When not working properly, the Extension Attribute will display the following value:

0
view raw
gistfile1.txt
hosted with ❤ by GitHub

The Extension Attribute’s values can then be used as Jamf Pro smart group criteria to create smart groups for software deployment.

This script is available below and also from GitHub at the following location:

https://github.com/rtrouton/rtrouton_scripts/tree/main/rtrouton_scripts/Casper_Extension_Attributes/set_deployment_group

#!/bin/bash
# This Jamf Pro Extension Attribute is designed to calculate and set a
# numerical identifier for individual Macs based on the Mac's machine UUID.
# This numerical identifier in turn is designed to be used to determine deployment
# groups.
#
# By default, this script is designed to set up and assign Macs to seven
# deployment groups, with the following percentage of Macs assigned to
# each group.
#
# Group % of Macs
# ————————-
# 1 1
# 2 5
# 3 10
# 4 20
# 5 20
# 6 20
# 7 24
#
# Put in the name of your company, school, or institution.
# Must all be one word without spaces
#
# Examples:
#
# MyGreatCompany
# TheNewSchool
# BankofGreaterNewtown
# MikesSurfShop
organizationName="companyname"
# Do not edit variables below this line
deploymentGroupFile="/Library/Preferences/com.${organizationName}.deploymentgroup.plist"
exitCode=0
log() {
local errorMsg="$1"
echo "$errorMsg"
/usr/bin/logger "$errorMsg"
}
deploymentGroupAssignment() {
deploymentGroup=7
# Get the machine's uuid
machineUUID=$(/usr/sbin/ioreg -rd1 -c IOPlatformExpertDevice | /usr/bin/awk '/IOPlatformUUID/ { gsub(/"/,"",$3); print $3; }')
# If the UUID is available, generate a hash of the UUID
# then use that hash to assign an index number.
if [[ -n "$machineUUID" ]]; then
uuidHash=$(echo "$machineUUID" | /usr/bin/shasum -a 512 | /usr/bin/sed 's/[^0-9]*//g')
indexNumber=$(echo "${uuidHash:0:12}" | /usr/bin/awk '{ print $1 % 100 }')
if [[ -n "$indexNumber" ]]; then
# Once the index number is assigned, match the index number
# to a deployment group's numerical identifier.
case "$indexNumber" in
1) deploymentGroup=1
;;
2|3|4|5|6) deploymentGroup=2
;;
7|8|9|10|11|12|13|14|15|16) deploymentGroup=3
;;
17|18|19|20|21|22|23|24|25|26|27|28|29|30|31|32|33|34|35|36) deploymentGroup=4
;;
37|38|39|40|41|42|43|44|45|46|47|48|49|50|51|52|53|54|55|56) deploymentGroup=5
;;
57|58|59|60|61|62|63|64|65|66|67|68|69|70|71|72|73|74|75|76) deploymentGroup=6
;;
*) deploymentGroup=7
;;
esac
fi
else
log "ERROR! Unable to get machine's machine UUID"
exitCode=1
fi
}
reportExtensionAttributeValue() {
deploymentGroupAssignmentCheck=$(/usr/bin/defaults read ${deploymentGroupFile} deploymentGroupAssignmentValue)
# The extension attribute should have a numeric value greater than zero.
# If the value is blank or a non-number, the following value is reported:
#
# 0
#
# The 0 value indicates that there was a problem determining the deployment group.
if [[ "$deploymentGroupAssignmentCheck" =~ ^[0-9]+$ ]]; then
echo "<result>$deploymentGroupAssignmentCheck</result>"
else
echo "<result>0</result>"
fi
}
# Check to see if there's an existing plist file in /Library/Preferences which has the
# deployment group's numerical identifier assigned as an integer value to the plist file's
# deploymentGroupAssignmentValue key.
#
# If there is not a plist file, or there is not a deploymentGroupAssignmentValue key with a numerical
# value inside the plist file, the extension attribute generates the deployment group's numerical identifier.
# Once the deployment group's numerical identifier is generated, the identifier is stored as an integer value
# to the plist file's deploymentGroupAssignmentValue key.
if [[ -r ${deploymentGroupFile} ]]; then
reportExtensionAttributeValue
else
/usr/bin/defaults delete ${deploymentGroupFile}
deploymentGroupAssignment
/usr/bin/defaults write ${deploymentGroupFile} deploymentGroupAssignmentValue -int "$deploymentGroup"
reportExtensionAttributeValue
fi
exit $exitCode

Installer package identifiers and the mystery of the missing Java 11 files

$
0
0

As part of developing new AutoPkg recipes to support SapMachine‘s new Long Term Support (LTS) distribution for Java 17, I ran into a curious problem when testing. When I ran the SapMachine Java 17 LTS installer that was being generated by AutoPkg, I was seeing the following behavior:

  • SapMachine Java 17 LTS is installed by itself – no problem
  • SapMachine Java 17 LTS installed, then SapMachine Java 11 LTS is installed – no problem
  • SapMachine Java 11 LTS installed, then SapMachine Java 17 LTS is installed – SapMachine Java 11 LTS is removed, only SapMachine Java 17 LTS is installed now.

I double-checked the preinstall script for the SapMachine Java 17 LTS installer. It is supposed to remove an existing SapMachine Java 17 LTS installation with the same version info, but it should not have also been removing SapMachine Java 11 LTS. After a re-review of the script and additional testing, I was able to rule out the script as the problem. But what was causing this behavior? Also, why was it happening in this order?

  • SapMachine Java 11 LTS installed, then SapMachine Java 17 LTS is installed

But not this order?

  • SapMachine Java 17 LTS installed, then SapMachine Java 11 LTS is installed

The answer was in how the package’s package identifier was set up. For more details, please see below the jump.

When I was writing the AutoPkg .pkg recipes for SapMachine Java 17 LTS, I used the existing SapMachine Java 11 LTS .pkg recipe as a template. Included with that recipe was the following:

<key>id</key>
<string>net.java.openjdk.sapmachine</string>
view raw
gistfile1.txt
hosted with ❤ by GitHub

For AutoPkg’s PkgCreator processor, this defines the package identifier.

I didn’t change that. That was a mistake, because that meant that Apple’s Installer was going to see SapMachine Java 17 LTS as an upgrade install for an existing SapMachine Java 11 LTS installation. Why is this important?

When macOS’s Installer does an upgrade install, it does the following:

  1. Consults its store of existing installer package receipts.
  2. Identifies if it has a receipt by a previous installer with a matching package identifier. If multiple receipts are found, the latest installed is used.
  3. Uses the Bill of Materials (BOM) stored with the receipt to generate a list of files which are in the receipt’s BOM and are not part of the new installer’s BOM.
  4. Removes the files in question.
  5. Adds the files from the current installer.

Note: Files added, removed or changed outside of the main installation process will not be included in the BOM. Since these files are not included in the BOM’s listing, the installer process will not move, change or delete these files. Examples of files not included or tracked by the BOM would be files added or moved by an installer package’s preinstall or postinstall scripts.

From Installer‘s point of view, the two packages were identified this way:

SapMachine Java 11 LTS

  • Identifier: net.java.openjdk.sapmachine
  • Version: 11.xx.xx

SapMachine Java 17 LTS

  • Identifier: net.java.openjdk.sapmachine
  • Version: 17.xx.xx

That meant that, on a Mac where SapMachine Java 11 LTS had been installed previously using an installer package with the net.java.openjdk.sapmachine package identifier, Installer interpreted the SapMachine Java 17 LTS install as being an upgrade for SapMachine Java 11 LTS.

In those conditions, Installer performs the following actions:

  1. Consults the existing installer package receipts.
  2. Identifies the latest version of the SapMachine Java 11 LTS receipt with a matching net.java.openjdk.sapmachine package identifier.
  3. Generates a list of the files installed by the SapMachine Java 11 LTS installer package, using the SapMachine Java 11 LTS receipt’s BOM, and identified those files which were not included in the SapMachine Java 17 LTS installer package’s BOM.
  4. Removes those files.
  5. Adds the files from the SapMachine Java 17 LTS installer.

The effect is that SapMachine Java 11 LTS’s files were automatically removed when SapMachine Java 11 LTS is installed first and then SapMachine Java 17 LTS is subsequently installed.

The fix? Make sure the SapMachine Java 17 LTS installer package has a different package identifier.

As I was using AutoPkg to build the installer package in question, I could include variables as part of the package identifier to help ensure the package identifier would be unique for each version of the SapMachine Java 17 LTS installer package.

<key>id</key>
<string>net.java.openjdk.sapmachine.universal.%version%.%BUILD_NUMBER%</string>
view raw
gistfile1.txt
hosted with ❤ by GitHub

For example, for SapMachine Java 17.35 LTS, the package identifier looks like this in the AutoPkg-created installer package:

<key>id</key>
<string>net.java.openjdk.sapmachine.universal.17.35</string>
view raw
gistfile1.txt
hosted with ❤ by GitHub

Using AutoPkg to create an installer package for SAP GUI

$
0
0

I’ve previously posted guides on how to manually package SAP GUI:

However it’s also possible to automate creating a SAP GUI installer package using AutoPkg. To do this, you’ll need the following:

  1. AutoPkg
  2. The SAP GUI recipes from the rtrouton-recipes repo
  3. The latest SAP GUI installer application’s disk image
  4. A SAP GUI templates.jar file (optional)

For more details, please see below the jump.

The AutoPkg recipes I’ve written will need the following information provided:

  • SAP GUI’s numeric information
  • SAP GUI’s alphanumeric information
  • SAP GUI’s application bundle identifier information

None of this information is available from the installer application, so you’ll need to provide it to AutoPkg using a com.sapgui.identifier.plist file which will be included along with the latest SAP GUI installer application’s disk image. Please see below for how to gather this information.

Preparing SAP GUI for AutoPkg

1. Copy the latest SAP GUI installer application’s disk image to a test Mac or virtual machine.

2. Mount the disk image and launch the SAP GUI for Java Installer installer application on the test Mac or virtual machine.

Screen Shot 2021 07 22 at 2 16 27 PM

3. Follow the prompts to install.

Screen Shot 2021 07 22 at 2 16 55 PM

Screen Shot 2021 07 22 at 2 17 20 PM

Screen Shot 2021 07 22 at 2 17 32 PM

Screen Shot 2021 07 22 at 2 17 56 PM

4. Once installed, run the following command to get SAP GUI’s alphanumeric version.

defaults read "/Applications/SAP Clients/SAPGUI $version/SAPGUI $version.app/Contents/Info.plist" NSHumanReadableCopyright | awk '{print $2$3$4}'

For example, if this is SAPGUI 7.70rev2, use the following command:

defaults read "/Applications/SAP Clients/SAPGUI 7.70rev2/SAPGUI 7.70rev2.app/Contents/Info.plist" NSHumanReadableCopyright| awk '{print $2$3$4}'

Screen Shot 2021 07 22 at 2 34 18 PM

5. Once you have the alphanumeric version, run the following command to get SAP GUI’s numeric version.

defaults read "/Applications/SAP Clients/SAPGUI $version/SAPGUI $version.app/Contents/Info.plist" CFBundleShortVersionString

For example, if this is SAPGUI 7.70rev2, use the following command:

defaults read "/Applications/SAP Clients/SAPGUI 7.70rev2/SAPGUI 7.70rev2.app/Contents/Info.plist" CFBundleShortVersionString

Screen Shot 2021 07 22 at 2 35 47 PM

6. Once you have both versions, run the following command to get SAP GUI’s bundle identifier:

defaults read "/Applications/SAP Clients/SAPGUI $version/SAPGUI $version.app/Contents/Info.plist" CFBundleIdentifier

For example, if this is SAPGUI 7.70rev2, use the following command:

defaults read "/Applications/SAP Clients/SAPGUI 7.70rev2/SAPGUI 7.70rev2.app/Contents/Info.plist" CFBundleIdentifier

Screen Shot 2021 07 22 at 2 45 12 PM

7. Open Terminal and run the following command to create a com.sapgui.identifier.plist file with the alphanumeric version information for SAP GUI:

defaults write /path/to/com.sapgui.identifier AlphanumericVersionString version_info_goes_here

For example, if the SAP GUI alphanumeric version is 7.70rev2, run the following command to create a com.sapgui.identifier.plist file on the Desktop:

defaults write $HOME/Desktop/com.sapgui.identifier AlphanumericVersionString 7.70rev2

Screen Shot 2021 07 22 at 2 49 14 PM

8. Run the following command to add the numeric version information for SAP GUI to the com.sapgui.identifier.plist file:

defaults write /path/to/com.sapgui.identifier CFBundleShortVersionString version_info_goes_here

For example, if the SAP GUI numeric version is 770.4.200, run the following command

defaults write $HOME/Desktop/com.sapgui.identifier CFBundleShortVersionString 770.4.200

Screen Shot 2021 07 22 at 2 59 28 PM

9. Run the following command to add the bundle identifier information for SAP GUI to the com.sapgui.identifier.plist file:

defaults write /path/to/com.sapgui.identifier CFBundleIdentifier bundle_identifier_info_goes_here

For example, if the SAP GUI bundle identifier is com.sap.platin, run the following command

defaults write $HOME/Desktop/com.sapgui.identifier CFBundleIdentifier com.sap.platin

Screen Shot 2021 07 22 at 2 58 32 PM

10. Once the com.sapgui.identifier.plist file is created and populated with the version and bundle identifier information, copy it to a convenient location along with the latest SAP GUI installer application’s disk image.

11. If you’re planning to include a templates.jar file with the SAP GUI installer, copy the templates.jar file to the same location.

Screen Shot 2021 06 18 at 12 12 51 PM

12. Create a .zip file of the following files:

  • corp.sap.sapgui.identifier.plist
  • Latest SAP GUI installer application’s disk image
  • templates.jar (if applicable)

For this example, I’m going to use the following filename for the .zip file:

latestsapgui.zip

This .zip file will be what’s used by AutoPkg to create the SAP GUI installer package.

Screen Shot 2019 10 09 at 11 30 35 AM


Using the AutoPkg recipes

To accomodate the fact that some folks will have a templates.jar file which they want to include and some folks won’t, I’ve written two sets of .pkg recipes:

  • SAPGUIWithTemplate.pkg – Use when you’re using a templates.jar file
  • SAPGUIWithoutTemplate.pkg – Use when you’re not using a templates.jar file

Both sets of recipes share a common SAPGUI.download recipe.

SAP GUI does not have a publicly accessible download link, so there are two options available for adding the .zip file you created earlier to your AutoPkg workflow:

1. Posting the .zip file to a web server for download.

You can upload the .zip file to a web server or other online storage location which AutoPkg can download files from. This is my preferred method because you can set the download URL in an AutoPkg override. Once that’s done, you just need to replace the .zip file on the web server when a new version of SAP GUI comes out. The next time it’s run, AutoPkg will download the new .zip file and handle the rest automatically.

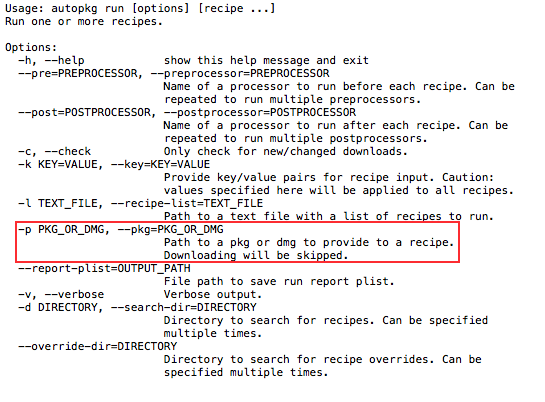
2. Using AutoPkg’s -p option.

AutoPkg includes an -p option for specifying a file for input, in place of downloading from a URL.

Screen shot 2015 01 26 at 7 36 26 am

For example, if you wanted to run the SAPGUIWithTemplate.pkg recipe and use a .zip file stored locally on your Mac, you would use the following command to run an AutoPkg override of the SAPGUIWithTemplate.pkg recipe and specify a .zip file named latestsapgui.zip:

autopkg run local.pkg.SAPGUIWithTemplate -p /path/to/latestsapgui.zip

Once you’ve sorted out how you’re adding the .zip file you created to your AutoPkg workflow, you should be able to use these recipes to create SAP GUI installer packages for use in your own environment.

For those who want to use code signing to sign the SAP GUI installers created by AutoPkg, I’ve also created the following .sign recipes:

SAPGUIWithTemplate.sign – Use when you’re using a templates.jar file
SAPGUIWithoutTemplate.sign – Use when you’re not using a templates.jar file

Each .sign recipe uses the appropriate .pkg recipe as a parent recipe.

Disabling the Erase All Contents and Settings function on macOS Monterey

$
0
0

As part of macOS Monterey, Apple has introduced the Erase All Contents and Settings function to macOS for Apple Silicon Macs. In my Monterey testing, this setting was very useful because it enabled me to reset my Mac to a factory default condition without having to spend extra time wiping the drive and installing a fresh copy of macOS.

Screen Shot 2021 10 14 at 9 46 35 AM

However, having this functionality available may not desired in all environments. For Mac admins supporting these environments, Apple has provided a new profile management option, as part of the Restrictions payload, which disables the Erase All Contents and Settings functionality on Apple Silicon Macs.

Screen Shot 2021 10 14 at 10 14 39 AM

For more details, please see below the jump.

I’ve written a profile to disable Erase All Contents and Settings functionality which does the following:

1. Removes the Erase All Contents and Settings… menu option from the System Preferences option.

Screen Shot 2021 10 14 at 9 47 17 AM

2. Blocks the Erase Assistant app from running.

Note: When the profile is installed, the Erase Assistant app will show the following message:

Erase Assistant is not supported on this Mac.

Screen Shot 2021 10 14 at 9 56 16 AM

In order to apply this profile, there are some pre-requisites:

  • User Approved Mobile Device Management (UAMDM) must be enabled on the target Mac.
  • Profile must be installed by an MDM server.

Those pre-requisites also apply to deploying this profile, which is available via the link below:

https://github.com/rtrouton/profiles/tree/main/DisableEraseAllContentsAndSettings

When deployed, the profile should appear similar to this in System Preference’s Profiles preference pane.

Screen Shot 2021 10 14 at 9 49 29 AM

Silently uninstalling system extensions on macOS Monterey and earlier

$
0
0

As part of the move from using kernel extensions to system extensions, there is an issue which can be a problem for Mac admins: Uninstalling a system extension from the command line usually involves a GUI window popping up and requesting admin authorization.

Screen Shot 2021 10 26 at 8 25 37 AM

This can be a problem for admins because it requires the logged-in user to:

  • Have admin rights.
  • Understand what the dialog is telling them.
  • Be willing to enter admin credentials when prompted.

For macOS Monterey, this issue has been addressed by the addition of the RemovableSystemExtensions property to the com.apple.system-extension-policy profile payload. This is used to identify system extensions which can be deactivated without requiring admin authorization.

Screen Shot 2021 10 26 at 11 41 26 AM

However, the RemovableSystemExtensions property is new in macOS Monterey and does not apply to macOS Big Sur and earlier. In the past, Mac admins have dealt with this issue through user education, providing warnings like the one shown below, or (in macOS 11.3 and later) removing the profile which authorized the system extension. In the latter case, removing authorization will also unload the system extension.

Screen Shot 2021 10 26 at 8 24 59 AM

However, there is a way to bypass the admin authorization. For more details, please see below the jump.

There are two parts to being able to silently uninstall a system extension. The first is that the app developer must have written into their code signed app a way to trigger Apple’s uninstall API for system extensions. An example of this can be found in the code of the open source Santa tool created by Google:

https://github.com/google/santa/blob/d2b6c2b6c2de33ba2267c54f9affcbf592046050/Source/santa/main.m#L64-L78

For Santa, this functionality can be triggered from the command line by running the following command:

/Applications/Santa.app/Contents/MacOS/santa --unload-system-extension

This call to Apple’s uninstall API must be from the same code-signed app which is using the system extension. Other applications or functions trying to call the uninstall function from outside the app will not be authorized to uninstall the system extension.

Assuming that the code is included in the app to trigger Apple’s uninstall API for system extensions, the next step is found in the authorization database as the setting which controls whether or not the logged-in user is prompted for admin credentials is located there. Running the following command should show the setting:

security authorizationdb read com.apple.system-extensions.admin

That should display output similar to what’s shown below:

<?xml version="1.0" encoding="UTF-8"?>
<!DOCTYPE plist PUBLIC "-//Apple//DTD PLIST 1.0//EN" "http://www.apple.com/DTDs/PropertyList-1.0.dtd"&gt;
<plist version="1.0">
<dict>
<key>class</key>
<string>rule</string>
<key>created</key>
<real>600880872.76305306</real>
<key>modified</key>
<real>656531090.20857704</real>
<key>rule</key>
<array>
<string>authenticate-admin-nonshared</string>
</array>
<key>version</key>
<integer>0</integer>
</dict>
</plist>

The rule key’s value is what determines whether the logged-in user is asked for admin authorization:

<key>rule</key>
<array>
<string>authenticate-admin-nonshared</string>
</array>
view raw

gistfile1.txt

hosted with ❤ by GitHub

By default, this value is set to the following:

authenticate-admin-nonshared

https://gist.github.com/rtrouton/bb4e4136af5ee1b8160f1638b68f1a86

However, this value can be changed. Setting it to the value shown below will stop the request for admin authorization:

allow

https://gist.github.com/rtrouton/dd26f434ff28edaac455b6b396b26e44

To change com.apple.system-extensions.admin‘s rule key value to allow, you can use the commands shown below:

security authorizationdb read com.apple.system-extensions.admin > /tmp/com.apple.system-extensions.admin.plist
/usr/libexec/PlistBuddy -c "Set rule:0 allow" /tmp/com.apple.system-extensions.admin.plist
security authorizationdb write com.apple.system-extensions.admin < /tmp/com.apple.system-extensions.admin.plist
view raw

gistfile1.txt

hosted with ❤ by GitHub

To revert back to the default value of authenticate-admin-nonshared, you can use the commands shown below:

security authorizationdb read com.apple.system-extensions.admin > /tmp/com.apple.system-extensions.admin.plist
/usr/libexec/PlistBuddy -c "Set rule:0 authenticate-admin-nonshared" /tmp/com.apple.system-extensions.admin.plist
security authorizationdb write com.apple.system-extensions.admin < /tmp/com.apple.system-extensions.admin.plist
view raw

gistfile1.txt

hosted with ❤ by GitHub

An example of how this can be used is with Microsoft Defender, which may deploy multiple system extensions. The example script below will uninstall Microsoft Defender and includes deactivating the system extensions without prompting the logged-in user for admin credentials:

#!/bin/bash
# Uninstall Microsoft Defender
# unload the launchd plist for the current user
currentUser=$(/bin/ls -l /dev/console | /usr/bin/awk '{ print $3 }')
# Temp plist files used for import and export from authorization database.
management_db_original_setting="$(mktemp).plist"
management_db_edited_setting="$(mktemp).plist"
management_db_check_setting="$(mktemp).plist"
# Expected settings from management database for com.apple.system-extensions.admin
original_setting="authenticate-admin-nonshared"
updated_setting="allow"
ManagementDatabaseUpdatePreparation() {
# Create temp plist files
touch "$management_db_original_setting"
touch "$management_db_edited_setting"
touch "$management_db_check_setting"
# Create backup of the original com.apple.system-extensions.admin settings from the management database
/usr/bin/security authorizationdb read com.apple.system-extensions.admin > "$management_db_original_setting"
# Create copy of the original com.apple.system-extensions.admin settings from the management database for editing.
/usr/bin/security authorizationdb read com.apple.system-extensions.admin > "$management_db_edited_setting"
}
UpdateManagementDatabase() {
if [[ -r "$management_db_edited_setting" ]] && [[ $(/usr/libexec/PlistBuddy -c "Print rule:0" "$management_db_edited_setting") = "$original_setting" ]]; then
/usr/libexec/PlistBuddy -c "Set rule:0 $updated_setting" "$management_db_edited_setting"
if [[ $(/usr/libexec/PlistBuddy -c "Print rule:0" "$management_db_edited_setting" ) = "$updated_setting" ]]; then
echo "Edited $management_db_edited_setting is set to allow system extensions to be uninstalled without password prompt."
echo "Now importing setting into authorization database."
/usr/bin/security authorizationdb write com.apple.system-extensions.admin < "$management_db_edited_setting"
if [[ $? -eq 0 ]]; then
echo "Updated setting successfully imported."
UpdatedAuthorizationSettingInstalled=1
fi
else
echo "Failed to update $management_db_edited_setting file with the correct setting to allow system extension uninstallation without prompting for admin credentials."
fi
fi
}
RestoreManagementDatabase() {
/usr/bin/security authorizationdb read com.apple.system-extensions.admin > "$management_db_check_setting"
if [[ ! $(/usr/libexec/PlistBuddy -c "Print rule:0" "$management_db_check_setting") = "$original_setting" ]]; then
if [[ -r "$management_db_original_setting" ]] && [[ $(/usr/libexec/PlistBuddy -c "Print rule:0" "$management_db_original_setting") = "$original_setting" ]]; then
echo "Restoring original settings to allow system extension uninstallation only after prompting for admin credentials."
echo "Now importing setting into authorization database."
/usr/bin/security authorizationdb write com.apple.system-extensions.admin < "$management_db_original_setting"
if [[ $? -eq 0 ]]; then
echo "Original setting successfully imported."
OriginalAuthorizationSettingInstalled=1
fi
else
echo "Failed to update the authorization database with the correct setting to allow system extension uninstallation only after prompting for admin credentials."
fi
fi
}
if [[ -n "$currentUser" && "$currentUser" != "root" ]]; then
/bin/launchctl bootout gui/$(/usr/bin/id -u "$currentUser") /Library/LaunchAgents/com.microsoft.wdav.tray.plist
fi
# Unload the launchd plist for the daemon
/bin/launchctl bootout system /Library/LaunchDaemons/com.microsoft.fresno.plist
/bin/launchctl bootout system /Library/LaunchDaemons/com.microsoft.fresno.uninstall.plist
# unload the kernel extension
/sbin/kextunload -v 6 -b com.microsoft.wdavkext
# Check for loaded system extensions.
wdavExtensions=$(/usr/bin/systemextensionsctl list | /usr/bin/grep -Eo "com.microsoft.wdav.[^[:space:]]+" | /usr/bin/uniq)
if [[ -n "$wdavExtensions" ]]; then
# Prepare to update authorization database to allow system extensions to be uninstalled without password prompt.
ManagementDatabaseUpdatePreparation
# Update authorization database with new settings.
UpdateManagementDatabase
# Uninstall the system extensions
#
# Note: If the updated settings to allow system extensions to be uninstalled without password prompt were not
# added successfully, this will prompt the user to enter their admin credentials, so a message will be displayed
# to let the user know.
if [[ -z UpdatedAuthorizationSettingInstalled ]]; then
/usr/bin/osascript -e 'display dialog "As part of the uninstall process for Microsoft" & "\nDefender, please enter your admin password when prompted." & "\n" & "\nYou may be prompted up to three times."buttons {"Understood"} default button 1 with icon Caution'
fi
# The system extensions will now be uninstalled. If needed, a message will be displayed to warn the user
# to enter their admin credentials.
#
# After the message is displayed, the user will be prompted for the password to authorize removal of Defender's system extensions.
for anExtension in ${wdavExtensions}; do
"/Applications/Microsoft Defender ATP.app/Contents/MacOS/wdavdaemon" uninstall-system-extension "$anExtension"
done
# Once the system extensions are uninstalled, the relevant settings for the authorization database will be restored from backup to their prior state.
if [[ -n UpdatedAuthorizationSettingInstalled ]]; then
RestoreManagementDatabase
if [[ -n "$OriginalAuthorizationSettingInstalled" ]]; then
echo "com.apple.system-extensions.admin settings in the authorization database successfully restored to $original_setting."
rm -rf "$management_db_original_setting"
rm -rf "$management_db_edited_setting"
rm -rf "$management_db_check_setting"
fi
fi
fi
# kill Microsoft Defender
/usr/bin/killall -SIGKILL "Microsoft Defender" "Microsoft Defender ATP"
# remove the global stuff
/bin/rm -rf "/Applications/Microsoft Defender ATP.app" \
/Library/Logs/Microsoft/mdatp \
"/Library/Application Support/Microsoft/Defender" \
"/Library/Application Support/Microsoft Defender ATP" \
/var/log/fresno*.log \
/Library/Extensions/com.microsoft.wdavkext \
/Library/Extensions/wdavkext.kext \
/Library/LaunchDaemons/com.microsoft.fresno.* \
/Library/LaunchAgents/com.microsoft.wdav.tray.plist
# remove stuff in users folders
localUsers=$(/usr/bin/dscl . -list /Users | /usr/bin/grep -v "^_")
for userName in ${localUsers}; do
# get path to user's home directory
userHome=$(/usr/bin/dscl . -read "/Users/$userName" NFSHomeDirectory 2>/dev/null | /usr/bin/sed 's/^[^\/]*//g')
if [[ -d "$userHome" && "$userHome" != "/var/empty" ]]; then
/bin/rm -rf "$userHome/Library/Saved Application State/com.microsoft.wdav.savedState" \
"$userHome/Library/Preferences/com.microsoft.wdav.plist" \
"$userHome/Library/Preferences/com.microsoft.wdavtray.plist" \
"$userHome/Library/Caches/Microsoft/uls/com.microsoft.wdav"
fi
done
# remove the mdatp user and group
/usr/bin/dscl /Local/Default -delete /Users/_mdatp
/usr/bin/dscl /Local/Default -delete /Groups/_mdatp
# forget the packages
allPKGS=$(/usr/sbin/pkgutil –pkgs="com.microsoft.wdav")
for aPKG in ${allPKGS}; do
/usr/sbin/pkgutil –forget "$aPKG"
done
exit 0

Before Microsoft Defender uninstallation:

username@computername ~ % systemextensionsctl list
2 extension(s)
— com.apple.system_extension.network_extension
enabled active teamID bundleID (version) name [state]
* * UBF8T346G9 com.microsoft.wdav.netext (101.47.27/101.47.27) Microsoft Defender ATP Network Extension [activated enabled]
— com.apple.system_extension.endpoint_security
enabled active teamID bundleID (version) name [state]
* * UBF8T346G9 com.microsoft.wdav.epsext (101.47.27/101.47.27) Microsoft Defender ATP Endpoint Security Extension [activated enabled]
username@computername ~ %
view raw

gistfile1.txt

hosted with ❤ by GitHub

After Microsoft Defender uninstallation:

username@computername ~ % systemextensionsctl list
2 extension(s)
— com.apple.system_extension.network_extension
enabled active teamID bundleID (version) name [state]
UBF8T346G9 com.microsoft.wdav.netext (101.47.27/101.47.27) Microsoft Defender ATP Network Extension [terminated waiting to uninstall on reboot]
— com.apple.system_extension.endpoint_security
enabled active teamID bundleID (version) name [state]
UBF8T346G9 com.microsoft.wdav.epsext (101.47.27/101.47.27) Microsoft Defender ATP Endpoint Security Extension [terminated waiting to uninstall on reboot]
username@computername ~ %
view raw

gistfile1.txt

hosted with ❤ by GitHub

Use of FileVault Institutional Recovery Keys no longer recommended by Apple

$
0
0

When legacy FileVault was first introduced as part of Mac OS X 10.3 Panther in 2005, it supported a recovery key method which used a special keychain named FileVaultMaster.keychain which by default had a private key and public key inside. This recovery key was used to provide certificate-based authentication to unlock the encrypted disk images which were used by legacy FileVault.

When FileVault 2 was announced as part of Mac OS X Lion in 2011, Apple announced that there would be two kinds of recovery keys available:

  1. Personal recovery keys (PRK) – These are recovery keys that are automatically generated at the time of encryption. These keys are generated as an alphanumeric string and are unique to the machine being encrypted. In the event that an encrypted Mac is decrypted and then re-encrypted, the existing personal recovery key would be invalidated and a new personal recovery key would be created as part of the encryption process.
  2. Institutional recovery keys (IRK) – These are pre-made recovery keys that can be installed on a system prior to encryption and most often used by a company, school or institution to have one common recovery key that can unlock their managed encrypted systems.

IRKs were the sole part of Apple’s FileVault 1 (also known as legacy FileVault) that was carried over into FileVault 2. IRKs were legacy FileVault’s recovery keys and they were used in almost exactly the same way. The main difference was that they were now used to unlock an encrypted disk as opposed to legacy FileVault’s disk images.

In FileVault 1 deployments, you were asked to set a Master Password when turning on FileVault 1’s encryption. When you set the Master Password, the FileVault 1 encryption process set the password that was entered as the password on the /Library/Keychains/FileVaultMaster.keychain file. In turn, the FileVaultMaster.keychain file contained two keys used for PKI certificate-based authentication (one public key and one private key). When the public and private keys are both stored in one keychain, the keychain can be used to unlock your FileVault 1-encrypted home folder in the event that the password to open it was lost or forgotten. The Master Password only unlocked the keychain and allowed the system to access those two PKI keys. This is the reason why you needed to set the Master Password before encrypting and why it was also important to use the same FileVaultMaster.keychain file across the machines where you wanted to make sure that the same recovery key was being used.

If you were deploying the same recovery key for your FileVault-encrypted Macs, Apple consistently recommended that you go into the FileVaultMaster.keychain file, remove the PKI private key, put the private key somewhere secure and deploy the FileVaultMaster.keychain file with only the public key inside. The reason was that, in the event that the password to the FileVaultMaster.keychain file was compromised, all the compromiser got was one half of the keypair (the public key half.) The private key would not be on the machine and thus not available to compromise the FileVault 1-encrypted homes on the machine. However, FileVault 1 would work with both the public and private keys stored in /Library/Keychains/FileVaultMaster.keychain.

In FileVault 2, Apple changed removing the private key from being a suggested best practice to being a technical requirement. If you want to use an institutional recovery key, your FileVaultMaster.keychain file needs to have just the public key in it. If both public and private keys are stored in the /Library/Keychains/FileVaultMaster.keychain file on a Mac, FileVault 2 will ignore the keychain and not use it as an institutional recovery key. In this case, enabling FileVault 2 encryption will automatically generate a personal recovery key.

That was then, this is now

Over the years, the PRK gained functionality while the IRK largely did not. With the advent of PRK escrow systems (found in most present-day MDM solutions), the IRK’s main advantage of being a recovery key which could be mass-deployed came to seen instead as a weakness. After all, better to have recovery keys where each encrypted drive has its own unique key in place of the danger of a compromised recovery key being able to unlock all the machines in your Mac environment.

You can also only use an IRK to unlock or decrypt if you were booted to macOS Recovery. Recovery’s limited functionality meant that users of an IRK would have to do some preparation work, including making sure that the IRK’s keychain file was available somewhere which could be reached from Recovery.

Meanwhile, Apple has made changes to the environments where you could use an IRK. Beginning with macOS Catalina, macOS Recovery now prompted you to log in with either a password associated with an admin user or with a PRK.

Screen Shot 2020 04 06 at 4 48 45 PM

Screen Shot 2020 04 06 at 1 53 51 PM

You could not use an IRK at this login screen. So now Mac admins found themselves in the situation where they had an IRK, but couldn’t use it to authenticate in Recovery and get to the point where they could use the IRK.

With the introduction of Apple Silicon Macs, Apple has also discontinued Target Disk Mode functionality. This also affected the use of IRKs because it removes the ability to unlock using an IRK while the locked drive is connected to another Mac via Target Disk Mode.

The combination of all of these factors has led to Apple making a written recommendation to not use IRKs for institutional deployments of FileVault on Macs.

Screen Shot 2021 10 29 at 3 24 29 PM

It’s been a long run for IRKs and they still do work as recovery keys (for now), but in my opinion it’s time to follow Apple’s stated recommendation and stop the deployment and use of IRKs as FileVault recovery keys.

Running Jamf Pro actions from outside Jamf Pro

$
0
0

Every so often, I need to have Jamf Pro perform actions where it’s difficult to arrange the timing and task order I want using the options available from the Jamf Pro server’s end. An example of this would be following an OS upgrade. I want the following:

  • Update the computer inventory record in Jamf Pro as soon as possible that the OS upgrade has occurred.
  • Don’t interfere with any other processes that Jamf Pro may be running at that time.

To address this, I want to use the following workflow:

  1. Make sure the Jamf Pro agent hasn’t run anything for at least the last five minutes.
  2. Enforce the Jamf Pro agent’s management framework
  3. Send the Jamf Pro server an updated inventory.

To run these tasks, I’m using a self-destructing LaunchDaemon and script. For more details, please see below the jump.

I’ve written an example script, which does the following:

  • Creates a LaunchDaemon
  • Creates a script in /var/root which is triggered to run by the LaunchDaemon

Once triggered to run, the script stored in /var/root verifies that the Mac can communicate with the Jamf Pro server. Once communication is verified, it takes the following actions:

  • Checks to see if the /var/log/jamf.log file has been modified in the previous five minutes.
  • Once it has been verified that the /var/log/jamf.log file has not been modified for at least the last five minutes, the script runs the following functions:
  1. Runs jamf manage to enforce the management framework using the latest available data from the Jamf Pro server
  2. Runs jamf recon to send an updated inventory to the Jamf Pro server
  3. Deletes LaunchDaemon file
  4. Deletes script file
  5. Unloads LaunchDaemon

Note: The order for deletion and unloading is important. If the LaunchDaemon is unloaded before the script deletes the LaunchDaemon’s and script’s file, LaunchD will stop the script’s run at the point where the LaunchDaemon unload command occurred. Both the script and LaunchDaemon are in the computer’s memory, so it’s possible to delete the files before the script unloads the LaunchDaemon from LaunchD.

This script is available below and also from GitHub at the following location:

https://github.com/rtrouton/rtrouton_scripts/tree/main/rtrouton_scripts/Casper_Scripts/jamf_pro_manage_inventory_update_and_check_in

#!/bin/bash
# Script for use with Jamf Pro when you want to trigger an update of the management framework, followed by an inventory update.
#
# The LaunchDaemon and accompanying script created by running this script verifies that the Mac can communicate with the Jamf Pro server.
# Once communication is verified, it takes the following actions:
#
# Checks to see if the /var/log/jamf.log file has been modified in the previous five minutes.
#
# Once it has been verified that the /var/log/jamf.log file has not been modified for at least the last five minutes,
# the script runs the following functions:
#
# Runs jamf manage to enforce the management framework using the latest available data from the Jamf Pro server
# Runs jamf recon to send an updated inventory to the Jamf Pro server
# Deletes LaunchDaemon file
# Deletes script file
# Unloads LaunchDaemon
#
#
# Note: The "runjamfproinventoryupdate.sh" script which is part of this script has the following variable set:
#
# jamfpro_server_port="443"
#
# This port is correct for all Jamf Cloud-hosted installations of Jamf Pro.
#
# If your Jamf Pro server is not using port 443, please change this port to the correct number.
# For on-premise Jamf Pro installations, this port is most commonly port 8443. If your Jamf Pro
# server is using port 8443, the variable should look like this:
#
# jamfpro_server_port="8443"
#
# If any previous instances of the runjamfproinventoryupdate LaunchDaemon and script exist,
# unload the LaunchDaemon and remove the LaunchDaemon and script files
if [[ -n $(/bin/launchctl list | grep "com.github.runjamfproinventoryupdate") ]]; then
/bin/launchctl bootout system/com.github.runjamfproinventoryupdate
fi
# Delete LaunchDaemon and script files files if they exist
/bin/rm -f \
"/Library/LaunchDaemons/com.github.runjamfproinventoryupdate.plist" \
"/var/root/runjamfproinventoryupdate.sh"
# Create the runjamfproinventoryupdate LaunchDaemon by using cat input redirection
# to write the XML contained below to a new file.
#
# The LaunchDaemon will run at load and every minute thereafter.
temp_directory=$(mktemp -d)
/bin/cat > "$temp_directory/com.github.runjamfproinventoryupdate.plist" << 'JAMF_PRO_INVENTORY_UPDATE_LAUNCHDAEMON'
<?xml version="1.0" encoding="UTF-8"?>
<!DOCTYPE plist PUBLIC "-//Apple//DTD PLIST 1.0//EN" "http://www.apple.com/DTDs/PropertyList-1.0.dtd"&gt;
<plist version="1.0">
<dict>
<key>Label</key>
<string>com.github.runjamfproinventoryupdate</string>
<key>ProgramArguments</key>
<array>
<string>sh</string>
<string>/var/root/runjamfproinventoryupdate.sh</string>
</array>
<key>RunAtLoad</key>
<true/>
<key>StartInterval</key>
<integer>60</integer>
</dict>
</plist>
JAMF_PRO_INVENTORY_UPDATE_LAUNCHDAEMON
# Create the runjamfproinventoryupdate script by using cat input redirection
# to write the shell script contained below to a new file.
/bin/cat > "$temp_directory/runjamfproinventoryupdate.sh" << 'JAMF_PRO_INVENTORY_UPDATE_SCRIPT'
#!/bin/bash
jamfpro_server_address=$(/usr/bin/defaults read /Library/Preferences/com.jamfsoftware.jamf.plist jss_url)
jamfpro_server_address="${jamfpro_server_address#*//}"
jamfpro_server_address="${jamfpro_server_address%%/}"
jamfpro_server_port="443"
jamf_binary="/usr/local/jamf/bin/jamf"
CheckSiteNetwork (){
# CheckSiteNetwork function adapted from Facebook's check_corp function script.
# check_corp script available on Facebook's IT-CPE Github repo:
#
# check_corp:
# This script verifies a system is on the corporate network.
# Input: CORP_URL= set this to a hostname on your corp network
# Optional ($1) contains a parameter that is used for testing.
# Output: Returns a check_corp variable that will return "True" if on
# corp network, "False" otherwise.
# If a parameter is passed ($1), the check_corp variable will return it
# This is useful for testing scripts where you want to force check_corp
# to be either "True" or "False"
# USAGE:
# check_corp # No parameter passed
# check_corp "True" # Parameter of "True" is passed and returned
site_network="False"
ping=$(host -W .5 $jamfpro_server_address)
# If the ping fails – site_network="False"
[[ $? -eq 0 ]] && site_network="True"
# Check if we are using a test
[[ -n "$1" ]] && site_network="$1"
}
CheckTomcat (){
# Verifies that the JSS's Tomcat service is responding.
tomcat_chk=$(nc -z -w 5 $jamfpro_server_address $jamfpro_server_port > /dev/null; echo $?)
if [ "$tomcat_chk" -eq 0 ]; then
/usr/bin/logger "Machine can connect to $jamfpro_server_address. Proceeding."
else
/usr/bin/logger "Machine cannot connect to $jamfpro_server_address. Exiting."
exit 0
fi
}
CheckLogAge (){
# Verifies that the /var/log/jamf.log hasn't been written to for at least five minutes.
# This should help ensure that both an inventory update and check-in can run and not
# have to wait for a policy to finish running.
jamf_log="/var/log/jamf.log"
current_time=$(date +%s)
last_modified=$(stat -f %m "$jamf_log")
if [[ $(($current_time-$last_modified)) -gt 300 ]]; then
/usr/bin/logger "Log has not been modified in the past five minutes. Proceeding."
else
/usr/bin/logger "Log has been modified in the past five minutes. Exiting."
exit 0
fi
}
UpdateManagementAndInventory (){
# Verifies that the Mac can communicate with the Jamf Pro server.
# Once communication is verified, it takes the following actions:
#
# 1. Runs jamf manage to enforce the Jamf Pro management framework
# 2. Runs jamf recon to send an updated inventory to the Jamf Pro server
#
jss_comm_chk=$($jamf_binary checkJSSConnection > /dev/null; echo $?)
if [[ "$jss_comm_chk" -gt 0 ]]; then
/usr/bin/logger "Machine cannot connect to the JSS. Exiting."
exit 0
elif [[ "$jss_comm_chk" -eq 0 ]]; then
/usr/bin/logger "Machine can connect to the JSS. Updating management framework and updating inventory."
$jamf_binary manage
$jamf_binary recon
fi
}
SelfDestruct (){
# Removes script and associated LaunchDaemon
if [[ -f "/Library/LaunchDaemons/com.github.runjamfproinventoryupdate.plist" ]]; then
/bin/rm "/Library/LaunchDaemons/com.github.runjamfproinventoryupdate.plist"
fi
rm -rf $0
if [[ -n $(/bin/launchctl list | grep "com.github.runjamfproinventoryupdate") ]]; then
/bin/launchctl bootout system/com.github.runjamfproinventoryupdate
fi
}
CheckSiteNetwork
if [[ "$site_network" == "False" ]]; then
/usr/bin/logger "Unable to verify access to site network. Exiting."
fi
if [[ "$site_network" == "True" ]]; then
/usr/bin/logger "Access to site network verified"
CheckTomcat
CheckLogAge
UpdateManagementAndInventory
SelfDestruct
fi
exit 0
JAMF_PRO_INVENTORY_UPDATE_SCRIPT
# Once the LaunchDaemon file has been created, fix the permissions
# so that the file is owned by root:wheel and set to not be executable
# After the permissions have been updated, move the LaunchDaemon into
# place in /Library/LaunchDaemons.
/usr/sbin/chown root:wheel "${temp_directory}/com.github.runjamfproinventoryupdate.plist"
/bin/chmod 644 "${temp_directory}/com.github.runjamfproinventoryupdate.plist"
/bin/chmod a-x "${temp_directory}/com.github.runjamfproinventoryupdate.plist"
/bin/mv "${temp_directory}/com.github.runjamfproinventoryupdate.plist" "/Library/LaunchDaemons/com.github.runjamfproinventoryupdate.plist"
# Once the script file has been created, fix the permissions
# so that the file is owned by root:wheel and set to be executable
# After the permissions have been updated, move the script into the
# place that it will be executed from.
/usr/sbin/chown root:wheel "$temp_directory/runjamfproinventoryupdate.sh"
/bin/chmod 755 "$temp_directory/runjamfproinventoryupdate.sh"
/bin/chmod a+x "$temp_directory/runjamfproinventoryupdate.sh"
/bin/mv "$temp_directory/runjamfproinventoryupdate.sh" "/var/root/runjamfproinventoryupdate.sh"
# After the LaunchDaemon and script are in place with proper permissions,
# load the LaunchDaemon to begin the script's execution.
if [[ -f "/Library/LaunchDaemons/com.github.runjamfproinventoryupdate.plist" ]] && [[ -x "/var/root/runjamfproinventoryupdate.sh" ]]; then
/bin/launchctl bootstrap system "/Library/LaunchDaemons/com.github.runjamfproinventoryupdate.plist"
fi
# Remove temp directory
/bin/rm -rf "$temp_directory"
exit 0


This technique is pretty flexible and can be used to trigger other tasks with Jamf Pro. One example would be triggering installation of a particular software package faster than usual. In this scenario, you may have a particular software installation which is a module for X software, but only members of a specific LDAP are supposed to get that module. So the module is set for installation on check-in and scoped as follows:

  • Target: Macs with X software installed.
  • Limitation: LDAP group
  • Exclusion: Macs with Module Installed.

Your check-in is scheduled to happen every fifteen minutes, but you get feedback from management that this process can’t wait fifteen minutes. It needs to happen within five minutes or sooner. No problem; this technique can be adapted to do the following:

  1. Runs jamf recon to send an updated inventory to the Jamf Pro server (to make sure that the module installation policy has the Mac in scope.)
  2. Runs jamf policy to trigger installation of the module.
  3. Deletes LaunchDaemon file
  4. Deletes script file
  5. Unloads LaunchDaemon

After that, add the script to your X Software install policy and set it to run as an After script. The module should now install within five minutes if installing X software was the last action taken by Jamf Pro.

An example script is available below:

#!/bin/bash
# Script for use with Jamf Pro when you want to trigger an inventory update followed by a policy check-in.
#
# The LaunchDaemon and accompanying script created by running this script verifies that the Mac can communicate with the Jamf Pro server.
# Once communication is verified, it takes the following actions:
#
# Checks to see if the /var/log/jamf.log file has been modified in the previous five minutes.
#
# Once it has been verified that the /var/log/jamf.log file has not been modified for at least the last five minutes,
# the script runs the following functions:
#
# Runs jamf recon to to send an updated inventory to the Jamf Pro server
# Runs jamf policy to force a check-in and run whatever policies are available to run on check-in.
# Deletes LaunchDaemon file
# Deletes script file
# Unloads LaunchDaemon
#
# Note: The "runjamfprocheckin.sh" script which is part of this script has the following variable set:
#
# jamfpro_server_port="443"
#
# This port is correct for all Jamf Cloud-hosted installations of Jamf Pro.
#
# If your Jamf Pro server is not using port 443, please change this port to the correct number.
# For on-premise Jamf Pro installations, this port is most commonly port 8443. If your Jamf Pro
# server is using port 8443, the variable should look like this:
#
# jamfpro_server_port="8443"
#
# If any previous instances of the runjamfprocheckin LaunchDaemon and script exist,
# unload the LaunchDaemon and remove the LaunchDaemon and script files
if [[ -n $(/bin/launchctl list | grep "com.github.runjamfprocheckin") ]]; then
/bin/launchctl bootout system/com.github.runjamfprocheckin
fi
# Delete LaunchDaemon and script files files if they exist
/bin/rm -f \
"/Library/LaunchDaemons/com.github.runjamfprocheckin.plist" \
"/var/root/runjamfprocheckin.sh"
# Create the runjamfprocheckin LaunchDaemon by using cat input redirection
# to write the XML contained below to a new file.
#
# The LaunchDaemon will run at load and every minute thereafter.
temp_directory=$(mktemp -d)
/bin/cat > "$temp_directory/com.github.runjamfprocheckin.plist" << 'JAMF_PRO_CHECKIN_LAUNCHDAEMON'
<?xml version="1.0" encoding="UTF-8"?>
<!DOCTYPE plist PUBLIC "-//Apple//DTD PLIST 1.0//EN" "http://www.apple.com/DTDs/PropertyList-1.0.dtd"&gt;
<plist version="1.0">
<dict>
<key>Label</key>
<string>com.github.runjamfprocheckin</string>
<key>ProgramArguments</key>
<array>
<string>sh</string>
<string>/var/root/runjamfprocheckin.sh</string>
</array>
<key>RunAtLoad</key>
<true/>
<key>StartInterval</key>
<integer>60</integer>
</dict>
</plist>
JAMF_PRO_CHECKIN_LAUNCHDAEMON
# Create the runjamfprocheckin script by using cat input redirection
# to write the shell script contained below to a new file.
/bin/cat > "$temp_directory/runjamfprocheckin.sh" << 'JAMF_PRO_CHECKIN_SCRIPT'
#!/bin/bash
jamfpro_server_address=$(/usr/bin/defaults read /Library/Preferences/com.jamfsoftware.jamf.plist jss_url)
jamfpro_server_address="${jamfpro_server_address#*//}"
jamfpro_server_address="${jamfpro_server_address%%/}"
jamfpro_server_port="443"
jamf_binary="/usr/local/jamf/bin/jamf"
CheckSiteNetwork (){
# CheckSiteNetwork function adapted from Facebook's check_corp function script.
# check_corp script available on Facebook's IT-CPE Github repo:
#
# check_corp:
# This script verifies a system is on the corporate network.
# Input: CORP_URL= set this to a hostname on your corp network
# Optional ($1) contains a parameter that is used for testing.
# Output: Returns a check_corp variable that will return "True" if on
# corp network, "False" otherwise.
# If a parameter is passed ($1), the check_corp variable will return it
# This is useful for testing scripts where you want to force check_corp
# to be either "True" or "False"
# USAGE:
# check_corp # No parameter passed
# check_corp "True" # Parameter of "True" is passed and returned
site_network="False"
ping=$(host -W .5 $jamfpro_server_address)
# If the ping fails – site_network="False"
[[ $? -eq 0 ]] && site_network="True"
# Check if we are using a test
[[ -n "$1" ]] && site_network="$1"
}
CheckTomcat (){
# Verifies that the JSS's Tomcat service is responding.
tomcat_chk=$(nc -z -w 5 $jamfpro_server_address $jamfpro_server_port > /dev/null; echo $?)
if [ "$tomcat_chk" -eq 0 ]; then
/usr/bin/logger "Machine can connect to $jamfpro_server_address. Proceeding."
else
/usr/bin/logger "Machine cannot connect to $jamfpro_server_address. Exiting."
exit 0
fi
}
CheckLogAge (){
# Verifies that the /var/log/jamf.log hasn't been written to for at least five minutes.
# This should help ensure that both an inventory update and check-in can run and not
# have to wait for a policy to finish running.
jamf_log="/var/log/jamf.log"
current_time=$(date +%s)
last_modified=$(stat -f %m "$jamf_log")
if [[ $(($current_time-$last_modified)) -gt 300 ]]; then
/usr/bin/logger "Log has not been modified in the past five minutes. Proceeding."
else
/usr/bin/logger "Log has been modified in the past five minutes. Exiting."
exit 0
fi
}
UpdateInventoryAndRunCheckin (){
# Verifies that the Mac can communicate with the Jamf Pro server.
# Once communication is verified, it takes the following actions:
#
# 1. Runs jamf recon to send an updated inventory to the Jamf Pro server
# 2. Runs jamf policy to run any policies which run on check-in
#
jss_comm_chk=$($jamf_binary checkJSSConnection > /dev/null; echo $?)
if [[ "$jss_comm_chk" -gt 0 ]]; then
/usr/bin/logger "Machine cannot connect to the JSS. Exiting."
exit 0
elif [[ "$jss_comm_chk" -eq 0 ]]; then
/usr/bin/logger "Machine can connect to the JSS. Updating inventory and doing policy check-in."
$jamf_binary recon
$jamf_binary policy
fi
}
SelfDestruct (){
# Removes script and associated LaunchDaemon
if [[ -f "/Library/LaunchDaemons/com.github.runjamfprocheckin.plist" ]]; then
/bin/rm "/Library/LaunchDaemons/com.github.runjamfprocheckin.plist"
fi
rm -rf $0
if [[ -n $(/bin/launchctl list | grep "com.github.runjamfprocheckin") ]]; then
/bin/launchctl bootout system/com.github.runjamfprocheckin
fi
}
CheckSiteNetwork
if [[ "$site_network" == "False" ]]; then
/usr/bin/logger "Unable to verify access to site network. Exiting."
fi
if [[ "$site_network" == "True" ]]; then
/usr/bin/logger "Access to site network verified"
CheckTomcat
CheckLogAge
UpdateInventoryAndRunCheckin
SelfDestruct
fi
exit 0
JAMF_PRO_CHECKIN_SCRIPT
# Once the LaunchDaemon file has been created, fix the permissions
# so that the file is owned by root:wheel and set to not be executable
# After the permissions have been updated, move the LaunchDaemon into
# place in /Library/LaunchDaemons.
/usr/sbin/chown root:wheel "${temp_directory}/com.github.runjamfprocheckin.plist"
/bin/chmod 644 "${temp_directory}/com.github.runjamfprocheckin.plist"
/bin/chmod a-x "${temp_directory}/com.github.runjamfprocheckin.plist"
/bin/mv "${temp_directory}/com.github.runjamfprocheckin.plist" "/Library/LaunchDaemons/com.github.runjamfprocheckin.plist"
# Once the script file has been created, fix the permissions
# so that the file is owned by root:wheel and set to be executable
# After the permissions have been updated, move the script into the
# place that it will be executed from.
/usr/sbin/chown root:wheel "$temp_directory/runjamfprocheckin.sh"
/bin/chmod 755 "$temp_directory/runjamfprocheckin.sh"
/bin/chmod a+x "$temp_directory/runjamfprocheckin.sh"
/bin/mv "$temp_directory/runjamfprocheckin.sh" "/var/root/runjamfprocheckin.sh"
# After the LaunchDaemon and script are in place with proper permissions,
# load the LaunchDaemon to begin the script's execution.
if [[ -f "/Library/LaunchDaemons/com.github.runjamfprocheckin.plist" ]] && [[ -x "/var/root/runjamfprocheckin.sh" ]]; then
/bin/launchctl bootstrap system "/Library/LaunchDaemons/com.github.runjamfprocheckin.plist"
fi
# Remove temp directory
/bin/rm -rf "$temp_directory"
exit 0

Disabling Recent Tags in the Finder window sidebar

$
0
0

Every so often, something gets added to macOS and enabled by default where I wish it was off by default. The Tags section of the Finder’s sidebar is one of those additions.

Screen Shot 2021 11 29 at 10 04 13 AM

Fortunately for my preferences, I recently figured out (thanks to Bob Gendler’s method for discovering settings via the unified logs) that display of the Tags section was controlled via the following setting:

Domain: com.apple.finder
Key: ShowRecentTags
Value: Boolean

To show Recent Tags in the Finder’s sidebar, run the following command as the logged-in user:

defaults write com.apple.Finder ShowRecentTags -bool true

Screen Shot 2021 11 29 at 10 41 26 AM

Here’s how the Recent Tags setting should now appear in the Finder preferences:

Screen Shot 2021 11 29 at 10 03 48 AM


To remove Recent Tags from the Finder’s sidebar, run the following command as the logged-in user:

defaults write com.apple.Finder ShowRecentTags -bool false

Screen Shot 2021 11 29 at 10 40 53 AM


Here’s how the Recent Tags setting should now appear in the Finder preferences:

Screen Shot 2021 11 29 at 10 06 54 AM


The new setting will not apply until the Finder is restarted, which can be accomplished via either logging out and logging back in or running the following command as the logged-in user:

killlall Finder

Screen Shot 2021 11 29 at 10 06 16 AM


After the Finder restart, the Tags section should no longer appear in the Finder window sidebar:

Screen Shot 2021 11 29 at 10 06 24 AM


In my case, I wanted them off permanently so I’ve also written a profile which can enforce this. It’s available via the link below:

https://github.com/rtrouton/profiles/blob/main/DisableRecentTagsinFinderSidebar


Preventing user and location inventory information from being changed by the jamf binary’s recon verb

$
0
0

You can allow or prevent local administrators on the computer from changing User and Location inventory information in Jamf Pro with the jamf binary by using the Allow local administrators to use the jamf binary recon verb to change User and Location inventory information in Jamf Pro checkbox. This is a feature which first appeared in Jamf Pro 10.20.x, but may not be well known.

Screen Shot 2020 03 17 at 10 54 47 AM

This setting is enabled by default and can be configured by navigating to Settings > Computer Management > Inventory Collection in Jamf Pro.

Screen Shot 2021 12 27 at 11 42 08 AM

Screen Shot 2021 12 27 at 11 43 13 AM

What this setting affects are the following options associated with the jamf binary’s recon verb:


-endUsername
-realname
-email
-position
-building
-department
-phone
-room
view raw

gistfile1.txt

hosted with ❤ by GitHub

Screen Shot 2021 12 27 at 12 10 53 PM

Why disable this setting? If you have workflows which leverage the user and location information stored in Jamf Pro, being able to change this setting from a managed Mac using the jamf binary’s recon verb may have security implications. In particular, PKI certificate authorities set up in Jamf Pro may use the user and location information stored in Jamf Pro to issue certificates to managed Macs.

Screen Shot 2021 12 27 at 11 39 03 AM

In the context of certificates used for authentication, being able to change the user and location stored in Jamf Pro from the managed Mac’s end may mean that an enduser with the ability to run the jamf binary’s recon verb may be able to get authentication certificates for someone other than themselves assigned to their Mac.

Screen Shot 2021 12 27 at 12 12 47 PM

If you do not have any workflows that use the recon verb’s options specified above, my advice is that you disable this setting and remove the ability of managed Macs to change the user and location information stored in Jamf Pro using the jamf binary’s recon verb.

Screen Shot 2021 12 27 at 12 02 48 PM

Identifying Intel Macs with Secure Enclave using Jamf Pro

$
0
0

Identifying Intel Macs with Secure Enclave using Jamf Pro

As part of a recent task, I needed to identify using Jamf Pro which Macs in our environment have Secure Enclave and which Macs do not. For Intel Macs, having Secure Enclave means that you have one of the following Macs:

Macs with the Apple T1 Security Chip

  • MacBook Pro (13-inch with Touch Bar, Late 2016)
  • MacBook Pro (15-inch with Touch Bar, Late 2016)
  • MacBook Pro (13-inch with Touch Bar, Mid-2017)
  • MacBook Pro (15-inch with Touch Bar, Mid-2017)

Macs with the Apple T2 Security Chip

  • iMac (Retina 5K, 27-inch, 2020)
  • iMac Pro
  • Mac Pro (2019)
  • Mac Pro (Rack, 2019)
  • Mac mini (2018)
  • MacBook Air (Retina, 13-inch, 2020)
  • MacBook Air (Retina, 13-inch, 2019)
  • MacBook Air (Retina, 13-inch, 2018)
  • MacBook Pro (13-inch, 2020, Two Thunderbolt 3 ports)
  • MacBook Pro (13-inch, 2020, Four Thunderbolt 3 ports)
  • MacBook Pro (16-inch, 2019)
  • MacBook Pro (13-inch, 2019, Two Thunderbolt 3 ports)
  • MacBook Pro (15-inch, 2019)
  • MacBook Pro (13-inch, 2019, Four Thunderbolt 3 ports)
  • MacBook Pro (15-inch, 2018)
  • MacBook Pro (13-inch, 2018, Four Thunderbolt 3 ports)

Jamf Pro doesn’t have a specific “this Mac has Secure Enclave” inventory identifier, so I decided to use Apple’s documentation on which Intel Mac models have Secure Enclave to build Jamf Pro smart groups with model identifiers. With Apple’s move to Apple Silicon processors, this list of models should not be added to in the future.

For Intel Macs equipped with T1 chips, here are the relevant model identifiers:


This file contains bidirectional Unicode text that may be interpreted or compiled differently than what appears below. To review, open the file in an editor that reveals hidden Unicode characters.
Learn more about bidirectional Unicode characters


MacBookPro13,2
MacBookPro13,3
MacBookPro14,2
MacBookPro14,3
view raw

gistfile1.txt

hosted with ❤ by GitHub

For Intel Macs equipped with T2 chips, here are the relevant model identifiers:


This file contains bidirectional Unicode text that may be interpreted or compiled differently than what appears below. To review, open the file in an editor that reveals hidden Unicode characters.
Learn more about bidirectional Unicode characters


iMac20,1
iMacPro1,1
MacPro7,1
Macmini8,1
MacBookAir8,1
MacBookAir8,2
MacBookAir9,1
MacBookPro15,1
MacBookPro15,2
MacBookPro15,3
MacBookPro15,4
MacBookPro16,1
MacBookPro16,2
MacBookPro16,3
MacBookPro16,4
view raw

gistfile1.txt

hosted with ❤ by GitHub

For more details, please see below the jump.

To create a smart group that contains the list of all Intel Macs equipped with Secure Enclave, I’ve created the following smart group XML file:

Jamf Pro smart group containing model identifiers for Intel Macs with Secure Enclave:


This file contains bidirectional Unicode text that may be interpreted or compiled differently than what appears below. To review, open the file in an editor that reveals hidden Unicode characters.
Learn more about bidirectional Unicode characters


<?xml version="1.0" encoding="UTF-8"?>
<computer_group>
<name>Intel Macs with Secure Enclave</name>
<is_smart>true</is_smart>
<criteria>
<criterion>
<name>Model Identifier</name>
<priority>0</priority>
<and_or>or</and_or>
<search_type>is</search_type>
<value>MacBookPro13,2</value>
</criterion>
<criterion>
<name>Model Identifier</name>
<priority>1</priority>
<and_or>or</and_or>
<search_type>is</search_type>
<value>MacBookPro13,3</value>
</criterion>
<criterion>
<name>Model Identifier</name>
<priority>2</priority>
<and_or>or</and_or>
<search_type>is</search_type>
<value>MacBookPro14,2</value>
</criterion>
<criterion>
<name>Model Identifier</name>
<priority>3</priority>
<and_or>or</and_or>
<search_type>is</search_type>
<value>MacBookPro14,3</value>
</criterion>
<criterion>
<name>Model Identifier</name>
<priority>4</priority>
<and_or>or</and_or>
<search_type>is</search_type>
<value>iMac20,1</value>
</criterion>
<criterion>
<name>Model Identifier</name>
<priority>5</priority>
<and_or>or</and_or>
<search_type>is</search_type>
<value>iMacPro1,1</value>
</criterion>
<criterion>
<name>Model Identifier</name>
<priority>6</priority>
<and_or>or</and_or>
<search_type>is</search_type>
<value>MacPro7,1</value>
</criterion>
<criterion>
<name>Model Identifier</name>
<priority>7</priority>
<and_or>or</and_or>
<search_type>is</search_type>
<value>Macmini8,1</value>
</criterion>
<criterion>
<name>Model Identifier</name>
<priority>8</priority>
<and_or>or</and_or>
<search_type>is</search_type>
<value>MacBookAir8,1</value>
</criterion>
<criterion>
<name>Model Identifier</name>
<priority>9</priority>
<and_or>or</and_or>
<search_type>is</search_type>
<value>MacBookAir8,2</value>
</criterion>
<criterion>
<name>Model Identifier</name>
<priority>10</priority>
<and_or>or</and_or>
<search_type>is</search_type>
<value>MacBookAir9,1</value>
</criterion>
<criterion>
<name>Model Identifier</name>
<priority>11</priority>
<and_or>or</and_or>
<search_type>is</search_type>
<value>MacBookPro15,1</value>
</criterion>
<criterion>
<name>Model Identifier</name>
<priority>12</priority>
<and_or>or</and_or>
<search_type>is</search_type>
<value>MacBookPro15,2</value>
</criterion>
<criterion>
<name>Model Identifier</name>
<priority>13</priority>
<and_or>or</and_or>
<search_type>is</search_type>
<value>MacBookPro15,3</value>
</criterion>
<criterion>
<name>Model Identifier</name>
<priority>14</priority>
<and_or>or</and_or>
<search_type>is</search_type>
<value>MacBookPro15,4</value>
</criterion>
<criterion>
<name>Model Identifier</name>
<priority>15</priority>
<and_or>or</and_or>
<search_type>is</search_type>
<value>MacBookPro16,1</value>
</criterion>
<criterion>
<name>Model Identifier</name>
<priority>16</priority>
<and_or>or</and_or>
<search_type>is</search_type>
<value>MacBookPro16,2</value>
</criterion>
<criterion>
<name>Model Identifier</name>
<priority>17</priority>
<and_or>or</and_or>
<search_type>is</search_type>
<value>MacBookPro16,3</value>
</criterion>
<criterion>
<name>Model Identifier</name>
<priority>18</priority>
<and_or>or</and_or>
<search_type>is</search_type>
<value>MacBookPro16,4</value>
</criterion>
</criteria>
<computers/>
</computer_group>

To narrow down if the Mac has a T1 or T2 chip installed, I also created the following smart group XML files:

Jamf Pro smart group containing model identifiers for Intel Macs with T1 chips:


This file contains bidirectional Unicode text that may be interpreted or compiled differently than what appears below. To review, open the file in an editor that reveals hidden Unicode characters.
Learn more about bidirectional Unicode characters


<?xml version="1.0" encoding="UTF-8"?>
<computer_group>
<name>Intel Macs with T1 chips</name>
<is_smart>true</is_smart>
<criteria>
<criterion>
<name>Model Identifier</name>
<priority>0</priority>
<and_or>or</and_or>
<search_type>is</search_type>
<value>MacBookPro13,2</value>
</criterion>
<criterion>
<name>Model Identifier</name>
<priority>1</priority>
<and_or>or</and_or>
<search_type>is</search_type>
<value>MacBookPro13,3</value>
</criterion>
<criterion>
<name>Model Identifier</name>
<priority>2</priority>
<and_or>or</and_or>
<search_type>is</search_type>
<value>MacBookPro14,2</value>
</criterion>
<criterion>
<name>Model Identifier</name>
<priority>3</priority>
<and_or>or</and_or>
<search_type>is</search_type>
<value>MacBookPro14,3</value>
</criterion>
</criteria>
<computers/>
</computer_group>

Jamf Pro smart group containing model identifiers for Intel Macs with T2 chips:


This file contains bidirectional Unicode text that may be interpreted or compiled differently than what appears below. To review, open the file in an editor that reveals hidden Unicode characters.
Learn more about bidirectional Unicode characters


<?xml version="1.0" encoding="UTF-8"?>
<computer_group>
<name>Intel Macs with T2 chips</name>
<is_smart>true</is_smart>
<criteria>
<criterion>
<name>Model Identifier</name>
<priority>0</priority>
<and_or>or</and_or>
<search_type>is</search_type>
<value>iMac20,1</value>
</criterion>
<criterion>
<name>Model Identifier</name>
<priority>1</priority>
<and_or>or</and_or>
<search_type>is</search_type>
<value>iMacPro1,1</value>
</criterion>
<criterion>
<name>Model Identifier</name>
<priority>2</priority>
<and_or>or</and_or>
<search_type>is</search_type>
<value>MacPro7,1</value>
</criterion>
<criterion>
<name>Model Identifier</name>
<priority>3</priority>
<and_or>or</and_or>
<search_type>is</search_type>
<value>Macmini8,1</value>
</criterion>
<criterion>
<name>Model Identifier</name>
<priority>4</priority>
<and_or>or</and_or>
<search_type>is</search_type>
<value>MacBookAir8,1</value>
</criterion>
<criterion>
<name>Model Identifier</name>
<priority>5</priority>
<and_or>or</and_or>
<search_type>is</search_type>
<value>MacBookAir8,2</value>
</criterion>
<criterion>
<name>Model Identifier</name>
<priority>6</priority>
<and_or>or</and_or>
<search_type>is</search_type>
<value>MacBookAir9,1</value>
</criterion>
<criterion>
<name>Model Identifier</name>
<priority>7</priority>
<and_or>or</and_or>
<search_type>is</search_type>
<value>MacBookPro15,1</value>
</criterion>
<criterion>
<name>Model Identifier</name>
<priority>8</priority>
<and_or>or</and_or>
<search_type>is</search_type>
<value>MacBookPro15,2</value>
</criterion>
<criterion>
<name>Model Identifier</name>
<priority>9</priority>
<and_or>or</and_or>
<search_type>is</search_type>
<value>MacBookPro15,3</value>
</criterion>
<criterion>
<name>Model Identifier</name>
<priority>10</priority>
<and_or>or</and_or>
<search_type>is</search_type>
<value>MacBookPro15,4</value>
</criterion>
<criterion>
<name>Model Identifier</name>
<priority>11</priority>
<and_or>or</and_or>
<search_type>is</search_type>
<value>MacBookPro16,1</value>
</criterion>
<criterion>
<name>Model Identifier</name>
<priority>12</priority>
<and_or>or</and_or>
<search_type>is</search_type>
<value>MacBookPro16,2</value>
</criterion>
<criterion>
<name>Model Identifier</name>
<priority>13</priority>
<and_or>or</and_or>
<search_type>is</search_type>
<value>MacBookPro16,3</value>
</criterion>
<criterion>
<name>Model Identifier</name>
<priority>14</priority>
<and_or>or</and_or>
<search_type>is</search_type>
<value>MacBookPro16,4</value>
</criterion>
</criteria>
<computers/>
</computer_group>

These smart group XML files can be imported into a Jamf Pro server via Jamf’s Classic API. To upload it using the Classic API, download the XML file to a convenient location, then run the command shown below (substituting as appropriate):


This file contains bidirectional Unicode text that may be interpreted or compiled differently than what appears below. To review, open the file in an editor that reveals hidden Unicode characters.
Learn more about bidirectional Unicode characters


curl -su username:password https://jamfpro.server.here:port.number.here/JSSResource/computergroups/id/0 -T /path/to/filename.xml -X POST
view raw

gistfile1.txt

hosted with ❤ by GitHub

For on-premise Jamf Pro servers, this API command will be similar to what’s shown below:


This file contains bidirectional Unicode text that may be interpreted or compiled differently than what appears below. To review, open the file in an editor that reveals hidden Unicode characters.
Learn more about bidirectional Unicode characters


curl -su username:password https://jamfpro.server.here:8443/JSSResource/computergroups/id/0 -T /path/to/filename.xml -X POST
view raw

gistfile1.txt

hosted with ❤ by GitHub

For Jamf Cloud-hosted Jamf Pro servers, this API command will be similar to what’s shown below:


This file contains bidirectional Unicode text that may be interpreted or compiled differently than what appears below. To review, open the file in an editor that reveals hidden Unicode characters.
Learn more about bidirectional Unicode characters


curl -su username:password https://jamfpro.server.name.here.jamfcloud.com/JSSResource/computergroups/id/0 -T /path/to/filename.xml -X POST
view raw

gistfile1.txt

hosted with ❤ by GitHub

If the smart group was successfully uploaded, you should next see output similar to that shown below:


This file contains bidirectional Unicode text that may be interpreted or compiled differently than what appears below. To review, open the file in an editor that reveals hidden Unicode characters.
Learn more about bidirectional Unicode characters


<?xml version="1.0" encoding="UTF-8"?><computer_group><id>64</id></computer_group>computername:~ username$
view raw

gistfile1.txt

hosted with ❤ by GitHub

Python 2.7 removed from macOS Monterey 12.3 beta

$
0
0

As part of the macOS Monterey 12.3 beta cycle, Apple included the following note in the publicly accessible release notes for the macOS Monterey 12.3 beta release:


This file contains bidirectional Unicode text that may be interpreted or compiled differently than what appears below. To review, open the file in an editor that reveals hidden Unicode characters.
Learn more about bidirectional Unicode characters


Python
Deprecations
Python 2.7 was removed from macOS in this update. Developers should use Python 3 or an alternative language instead. (39795874)
view raw

gistfile1.txt

hosted with ❤ by GitHub

Screen Shot 2022 01 27 at 2 19 03 PM


https://developer.apple.com/documentation/macos-release-notes/macos-12_3-release-notes

This is a development which Apple has warned about for a while, beginning with macOS Catalina’s release notes:

Screen Shot 2022 01 27 at 2 36 48 PM

https://developer.apple.com/documentation/macos-release-notes/macos-catalina-10_15-release-notes

Apple has not included a Python 3 runtime with macOS Monterey, so the removal of Python 2.7 from macOS 12.3 and later will mean that Apple is no longer shipping a Python runtime as part of macOS.

For those who want or need to use an Apple-supplied Python distribution, Python 3 is included as part of Xcode and the Xcode Command Line Tools. Those tools are not part of macOS and will need to be installed separately.

As an alternative, a number of shops have been deploying their own Python 3 distribution. For more information on this, please see Greg Neagle’s Snakes on a Plan session from MacSysAdmin 2020:

Session slides:
http://docs.macsysadmin.se/2020/pdf/SnakesOnAPlan.pdf

Session video:
http://docs.macsysadmin.se/2020/video/Day1Session1.mp4

profiles command includes client-side rate limitation for certain functions on macOS 12.3

$
0
0

One of the changes brought with macOS 12.3 is that the profiles command line tool now includes a rate limiter for some of its functions:

profiles show

Screen Shot 2022 03 22 at 3 55 30 PM

profiles validate

Screen Shot 2022 03 22 at 3 55 47 PM

In both cases, running these functions may be limited to once every 23 hours.

For those familiar with rate limitation on the server side, where a server may choose to limit how many calls can be received in a set period from a client, this rate limitation is similar but is set and managed entirely on the client side. This means that there is no bypassing the profiles command’s rate limitation in this case for the Mac in question.

One way this may appear is on Macs which are part of the Automated Device Enrollment program, where the Mac can show its enrollment status by running the following command:


This file contains bidirectional Unicode text that may be interpreted or compiled differently than what appears below. To review, open the file in an editor that reveals hidden Unicode characters.
Learn more about bidirectional Unicode characters


profiles show -type enrollment
view raw

gistfile1.txt

hosted with ❤ by GitHub

In the event that this command errors, the profiles command will block further attempts to display this information for the next 23 hours. In this situation, you may see output like that shown below:


This file contains bidirectional Unicode text that may be interpreted or compiled differently than what appears below. To review, open the file in an editor that reveals hidden Unicode characters.
Learn more about bidirectional Unicode characters


username@computername ~ % sudo profiles show -type enrollment
Password:
Device Enrollment configuration:
(null)
username@computername ~ % sudo profiles show -type enrollment
Error fetching Device Enrollment configuration – Request too soon. Try again later.
view raw

gistfile1.txt

hosted with ❤ by GitHub

At this time, I don’t know where the information which tracks this 23 hour limitation is stored, but I did confirm that it is stored somewhere in the writable portion of the Mac’s boot drive. Wiping the Mac’s boot drive, via a disk wipe and OS reinstall or via Erase All Contents and Settings, will remove whatever is tracking and enforcing the 23 hour limitation.

Update – 4-22-2022:

It looks like the file which tracks this information is stored in the following location:

/private/var/db/ConfigurationProfiles/Settings/.profilesFetchTimerCheck

This file is protected by SIP. Thanks to zolotkey in the comments!

Also, in the original version of this post, I had made a mistake and conflated the functions of the following commands:

  • profiles renew -type enrollment
  • profiles show -type enrollment

The profiles renew -type enrollment command can be used to enroll or re-enroll a Mac which is part of the Automated Device Enrollment program with the MDM server that ADE associates the Mac with. To the best of my knowledge, the renew function of the profiles command does not have a client side rate limitation on macOS 12.3. Thanks also to Richard in the comments for catching my mistake and letting me know about it.

Simple Package Creator 1.5 now available

$
0
0

Simple Package Creator.app, an Automator application that will allow the selection of a self-contained application and creates an installer package that enables the installation of the application with pre-set permissions into /Applications, has been updated to version 1.5.

The functionality and operations of the app have not changed from Simple Package Creator 1.4. The main change is that Simple Package Creator.app is now a Universal app, allowing it to run natively on both Intel and Apple Silicon Macs.

Simple Package Creator 1.5, along with all components and scripts, are available on GitHub via the link below:

https://github.com/rtrouton/Simple-Package-Creator

Viewing all 490 articles
Browse latest View live